
The Securities Module (also called Products) lists all the financial instruments ever entered in the system. It allows you to browse desired instruments and check or edit their data, create new instruments, create orders against them, etc.
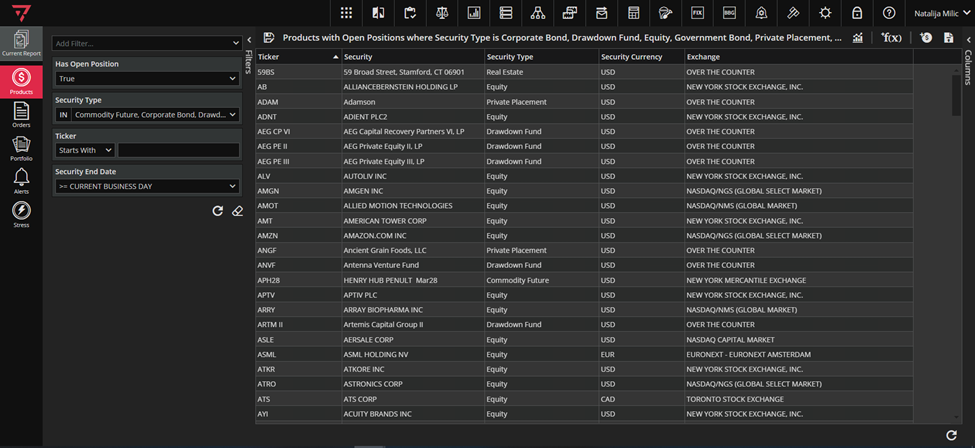
To access the Security (Products) module, click on the icon marked green in the screenshot below.

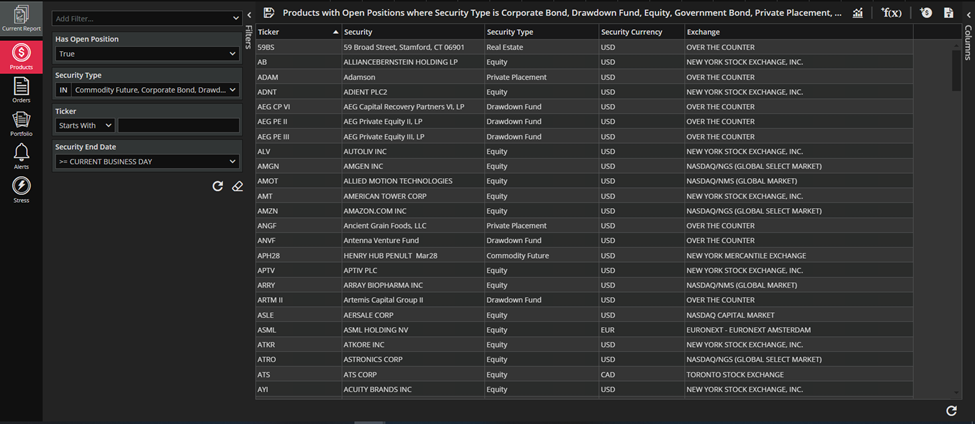
When you open the Securities (Products) module, the module will look like in the screenshot below.
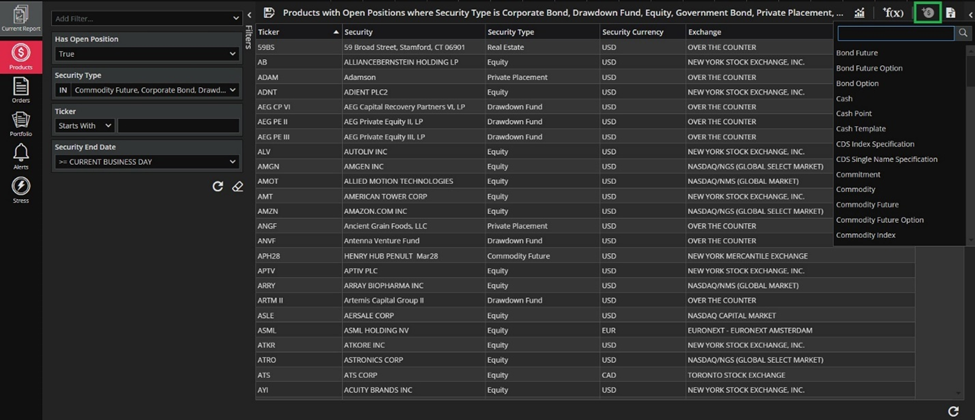
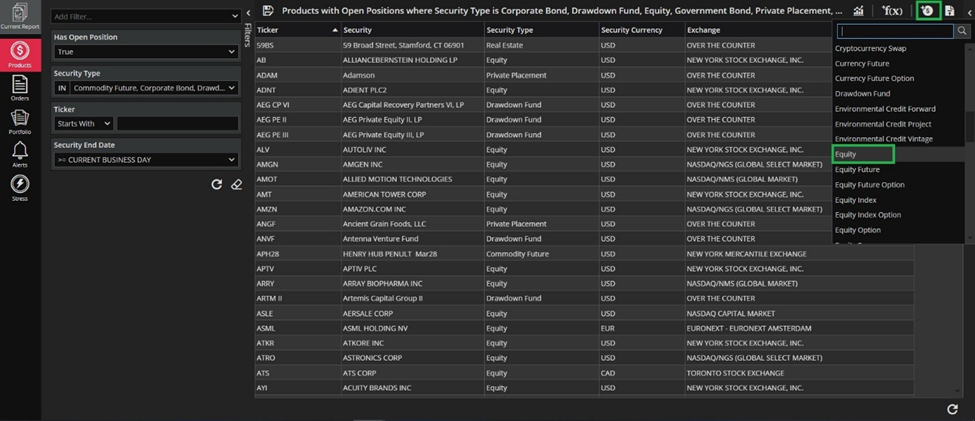
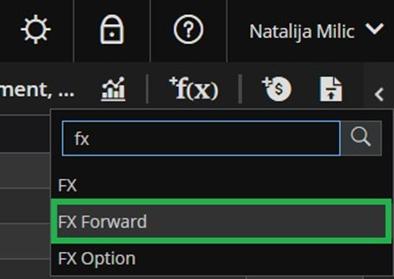
Creating new instruments is possible from the shortcut in the toolbar on the right side of the report`s header. By clicking on some of the items from the drop-down shown, you will be directed to the empty form for creating the desired type of instrument.
New instruments can also be created through the Security loader (screenshot below).
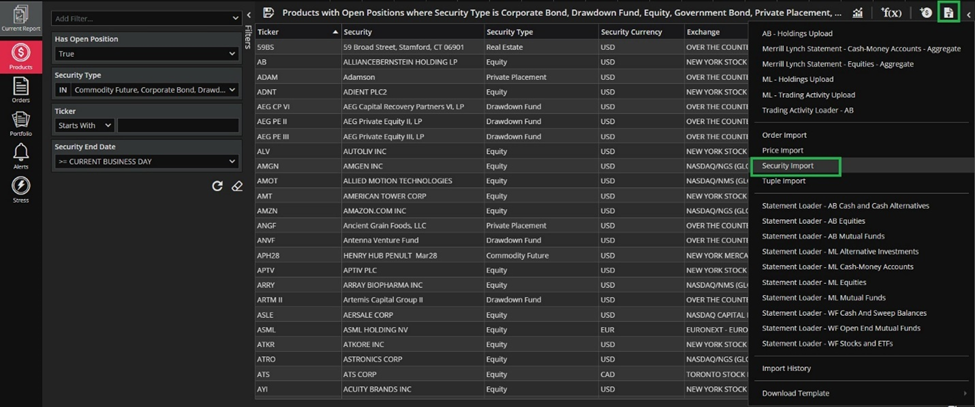
More details about how to import data into Ruby can be found in the Importing data into RUBY section.
There are various types of instruments Ruby supports: equities, funds, bonds, options, warrants, rights, futures, swaps, commitments etc. If you need additional types – please contact our Support Team. In the sequel we introduce a couple of important facts about certain instruments. Let’s start with creating an Equity.
To create a new Equity, select “Equity” from the drop-down list.
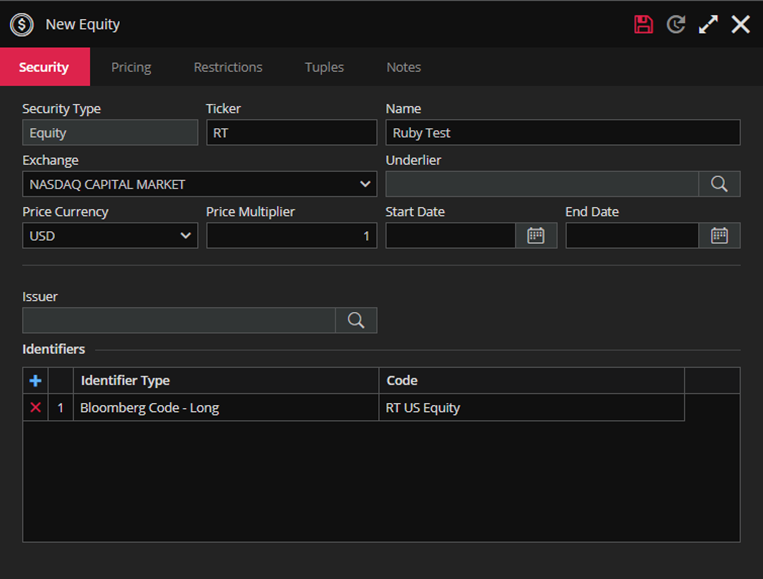
This is the New Equity form.
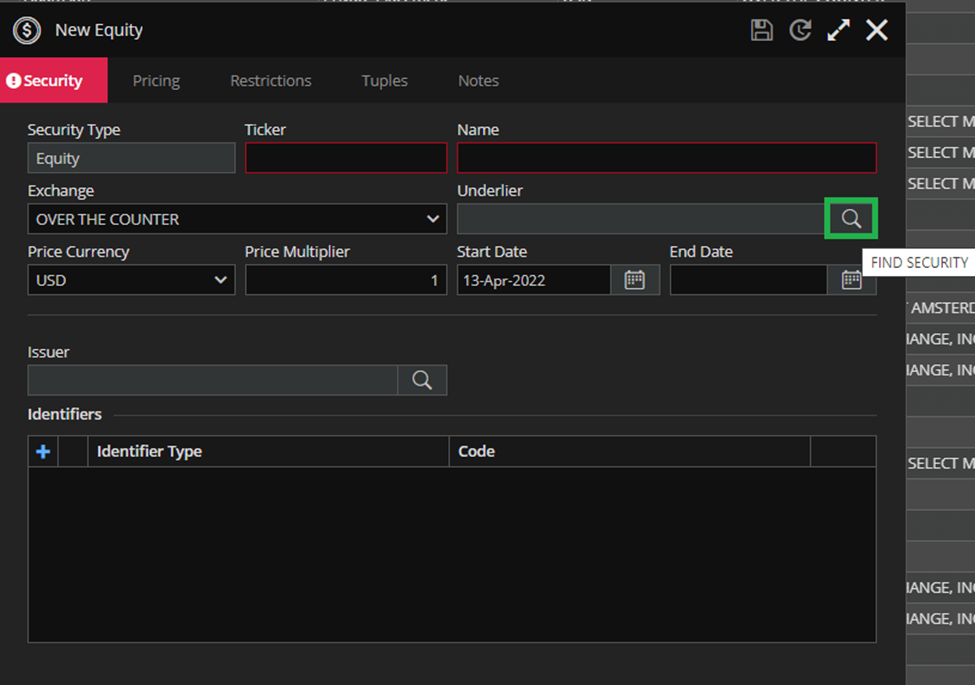
The fields marked in red are mandatory and you will need to populate them at the minimum to save your Equity.
For a more detailed explanation of available fields please see below.
“Security Type” is automatically set to the security type that you chose in the create-security drop down list and cannot be changed.
“Ticker” field is a short name for your newly created equity and is typically used to capture exchange ticker.
“Name” is a long name or description for your new equity.
“Exchange” captures the exchange where your security trades. Select one of the values from the associated drop-down list. If you cannot find the value that you are looking for, contact our Support Team and we will be happy to add new values.
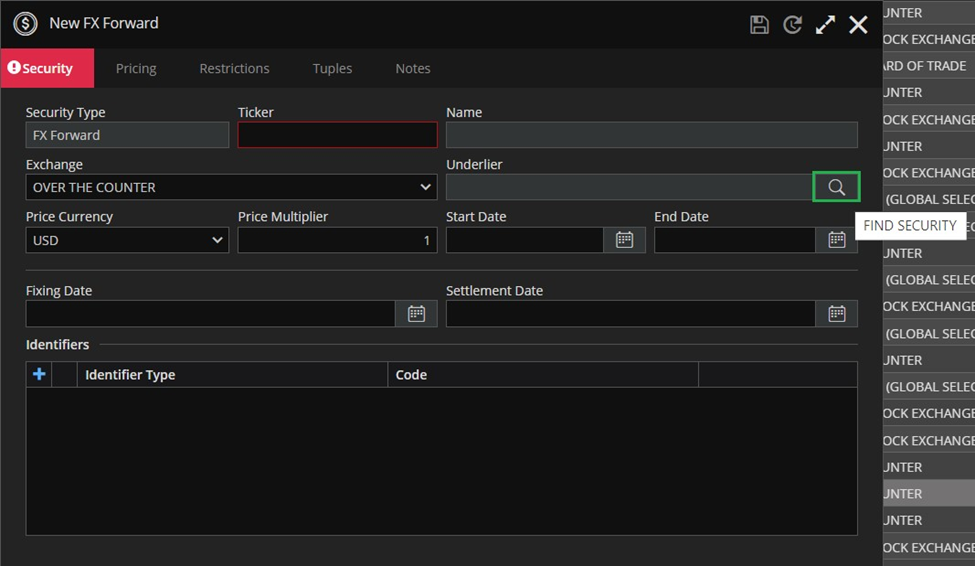
“Underlier” field is enabled for all security types. Therefore, we can select an underlying security for any security type by clicking on the FIND SECURITY button (it’s marked green in the screenshot above).
“Price Currency” captures the currency in which your new equity is priced and it is defaulted to USD (but it can be changed).
“Price Multiplier” defaults to 1 and would rarely need to be set to a different value for securities of type equity.
“Start Date” and “End Date” define the period of time during which orders against this security can be booked in RUBY. Start Date defaults to current date and End Date is blank indicating that there is no known date for when this security would stop trading. The Start Date and End Date fields should be populated with values that correspond to the dates that this security can be traded in its associated exchange. You have the option to leave these fields blank, in which case, you would be able to book orders against the given security with any trade date.
“Issuer” field is available only in Equity form. We can select an Issuer security, but it’s not mandatory.
“Identifiers” section
This section captures the various identifiers, such as ISIN, CUSIP, SEDOL and various Bloomberg codes that the system needs to communicate with other systems such as counterparties, fund administrators, and risk aggregators.
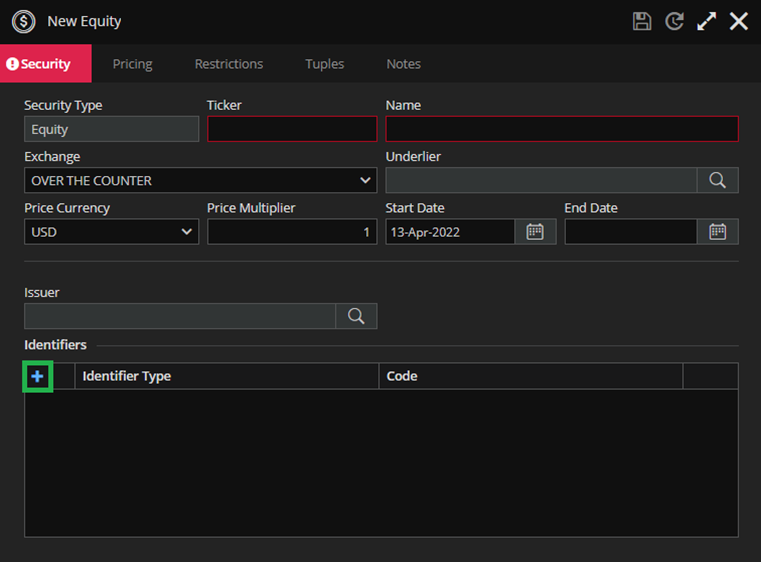
To add a new identifier, click on the plus icon (screenshot below).
Once you have clicked, the new row will be added. Clicking the Identifier Type field will provide you the drop-down where you can choose appropriate identifier for your new Equity.
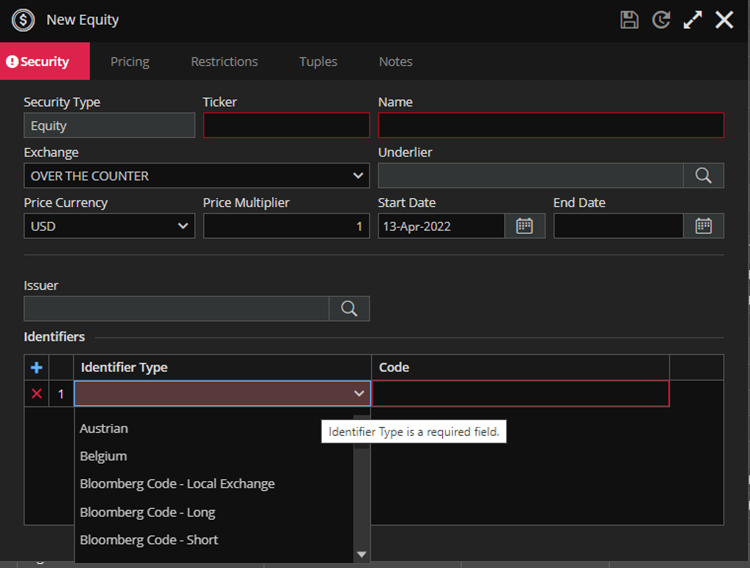
After you populated the Identifiers section (and all other mandatory fields), the save button will be enabled.
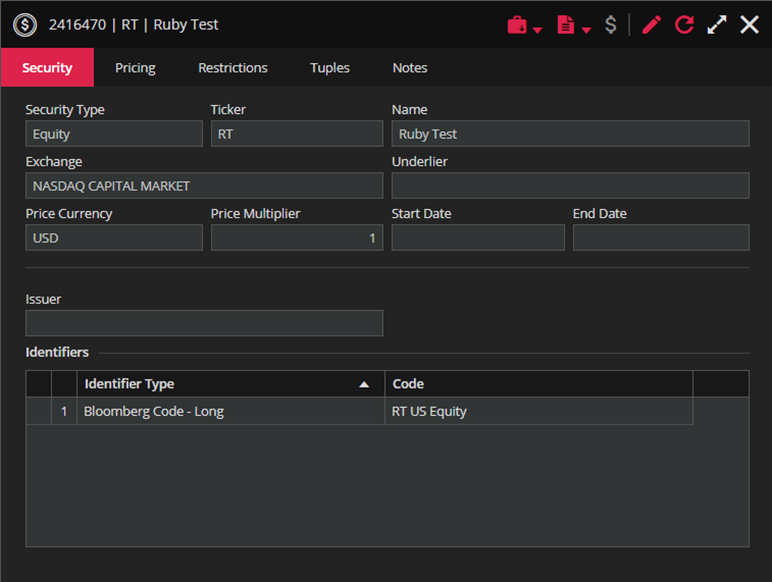
Once saved, your new equity will look like the screenshot below.
You can use similar approach to create any other security type. There are small differences in the process of creating certain security types which will be explained below.
If you want to create certain security types you will have to select an Underlier first. Let’s say we are creating an Equity Option. After you choose an Equity Option the Select Underlier window will pop-up.
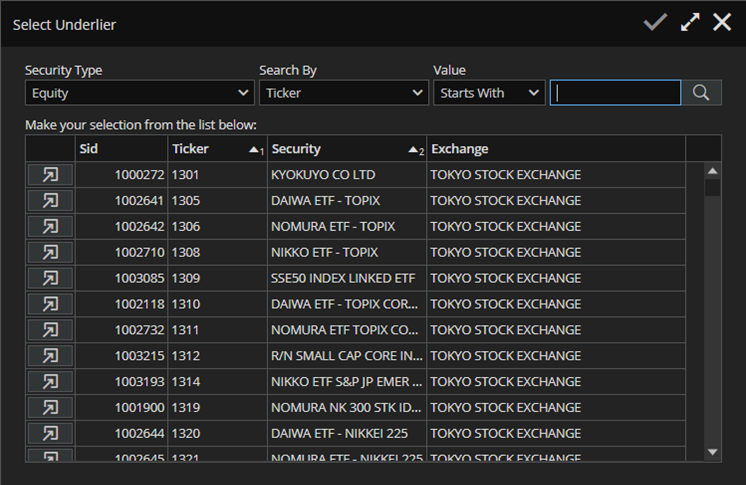
After you select an Underlier the APPLY button will be enabled. By clicking on the APPLY button the Add Option Details form pops-up.
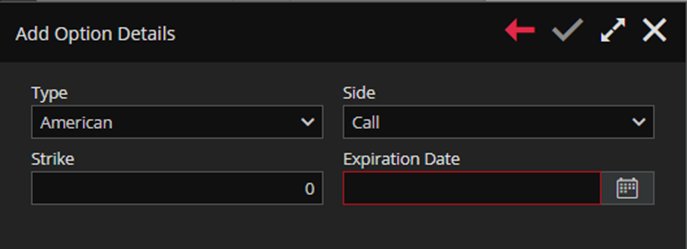
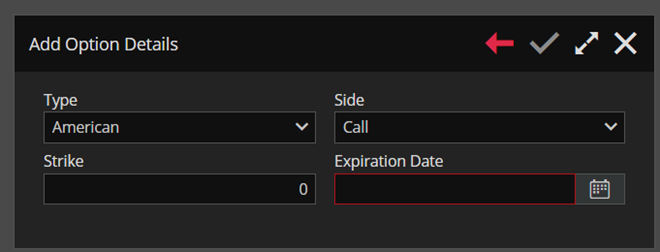
Now you can adjust option Type and Side by choosing from a drop-down list. The option Strike (Strike Price) is set to zero by default, but in general you should set today’s price of the underlying security or you can find the option strike price in Bloomberg (OPT_STRIKE_PX) and set up the Strike price. As you can see Expiration Date field is a required filed and represents option expiration date.
Once all option details are there you can click on the APPLY button and the new option form appears. The SAVE button is enabled (see screenshot below), because all the required fields are filled in automatically.
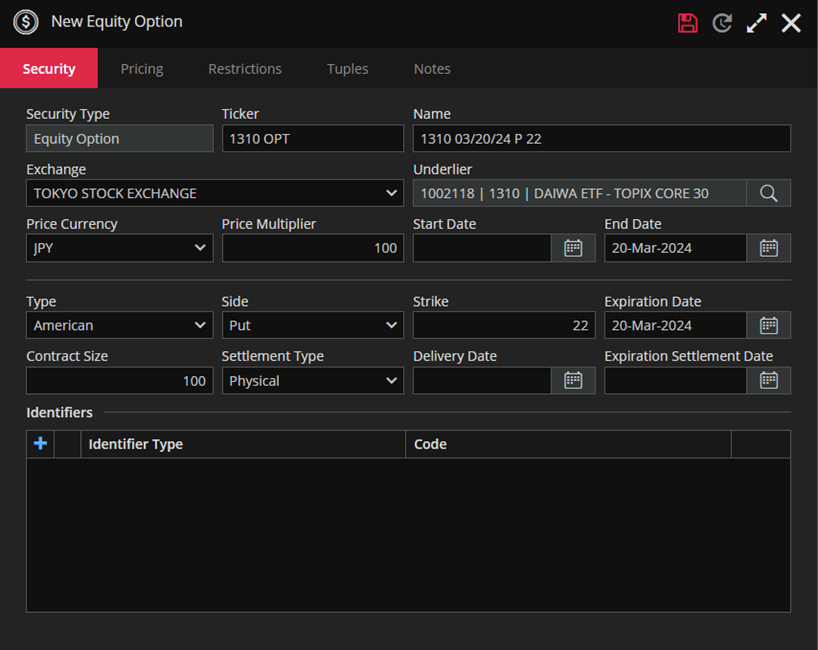
Creating other security types that require an Underlier is very similar.
The procedure for creating a Constant Maturity Swap can be found in the Valuation Section.
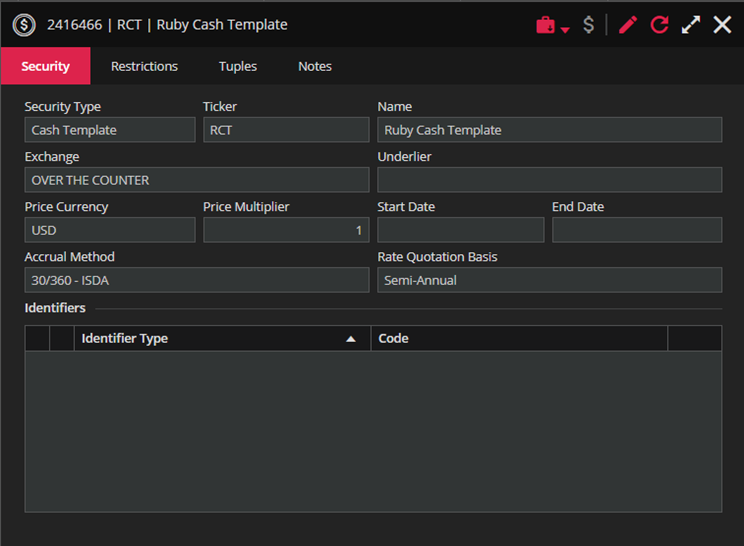
Similarly, we have to create Cash Template in order to be able to create Cash Point security. In the screenshot below we have an example of Cash Template.
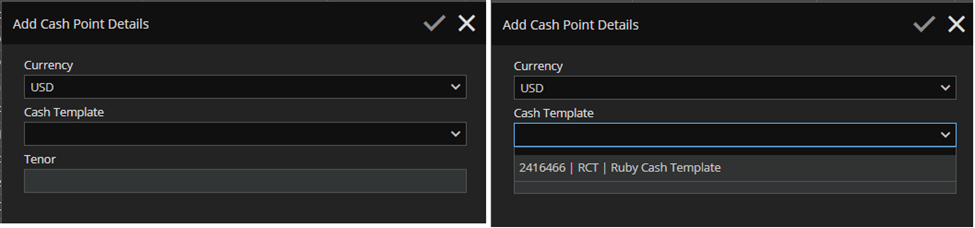
After selecting a Cash Point from CREATE SECURITY drop-down, the Add Cash Point Details form will pop up. The Tenor field will be enabled after we select the Cash Template.
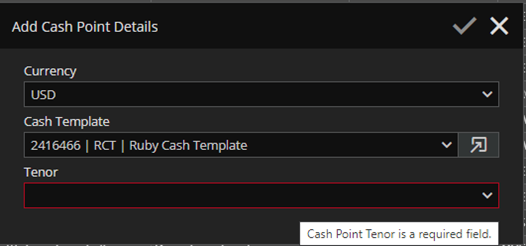
When we set all the details and click on APPLY button, the Cash Point form will pop up.
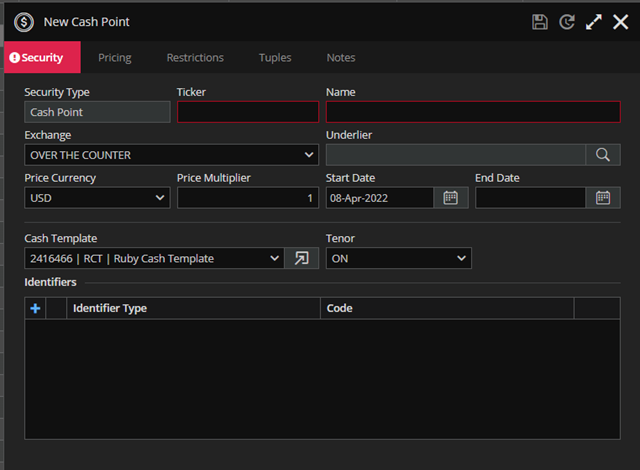
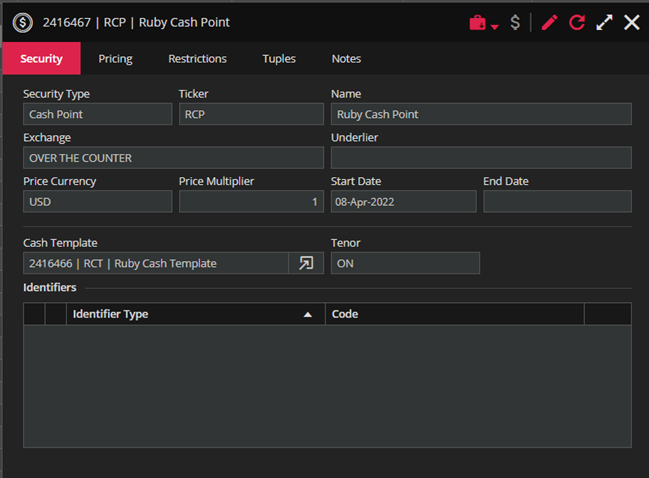
In the screenshot below is an example of Cash Point security.
When creating Credit Default Swap-Index, Credit Default Swap-Single Name and Interest Rate Swap you will need to select CDS Index Specification, CDS Single Name Specification and IR Swap Specification first, respectively.
In the same way, when creating Environmental Credit you will have to select Environmental Credit Project first.
Let us now pay a little attention to the creation of FX rates, FX Forwards and FX Option security types with reference to the usual conventions that apply in general.
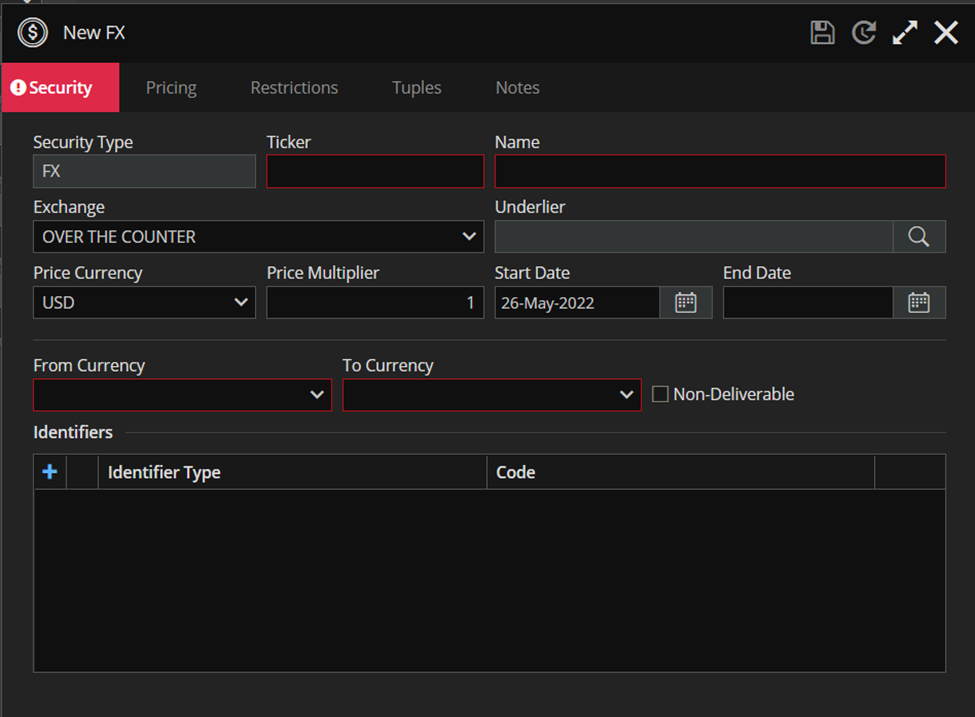
The FX rate (exchange rate) is the value of one nation’s currency versus the currency of another nation or economic zone. Typically, an exchange rate is quoted using an acronym for the national currency it represents. For example, the acronym USD represents the U.S. dollar, while EUR represents the euro. To quote the currency pair for the dollar and the euro, it would be EUR/USD. In the case of the Japanese yen, it’s USD/JPY, or dollar to yen. An exchange rate of 100 would mean that 1 dollar equals 100 yen. In the screenshot below we can see the form for new FX rate security in Ruby.
After populating all the fields we get:
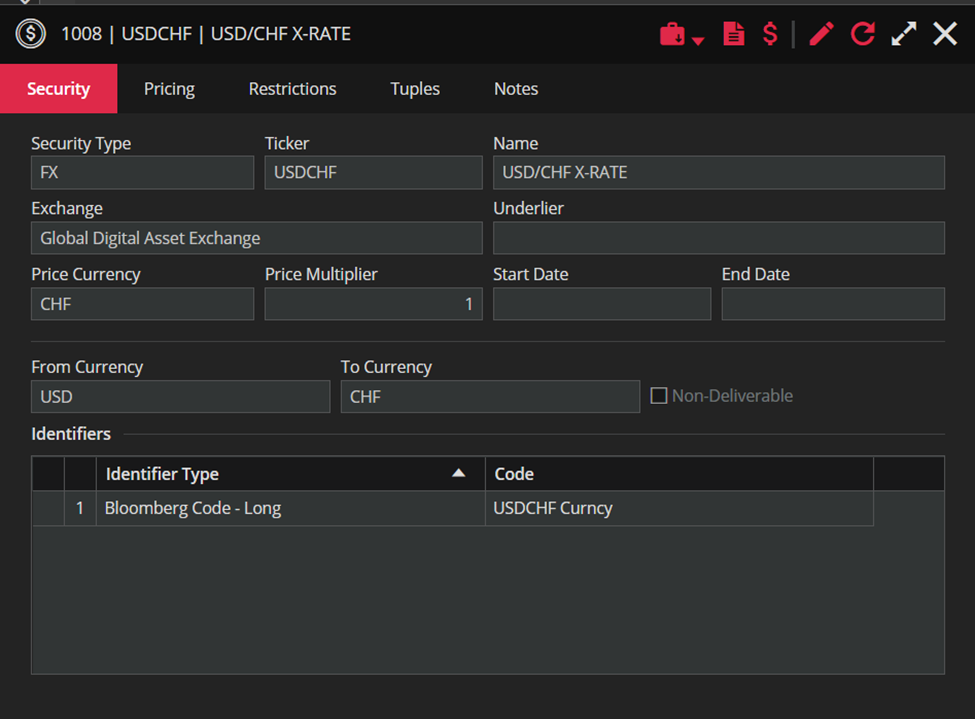
Pay attention that Price Currency for USD/CHF X-RATE is CHF. It should always be the second (weak) currency.
On top of FX rate we can create FX Forward. A FX Forward (currency forward) is a binding contract in the foreign exchange market that locks in the exchange rate for the purchase or sale of a currency on a future date.
The other major benefit of a currency forward is that its terms are not standardized and can be tailored to a particular amount and for any maturity or delivery period, unlike exchange-traded currency futures.
Both exchange rates and currency forwards are OTC instruments, as they do not trade on a centralized exchange.
There are two ways to create FX Forward security in Ruby – we can create FX Forward directly by selecting FX Forward security from the CREATE SECURITY menu or we can book forward trade against FX rate security. We will explain both procedures below.
After we select FX Forward security from the CREATE SECURITY drop-down menu, the new FX Forward security form will pop up (see screenshots below).
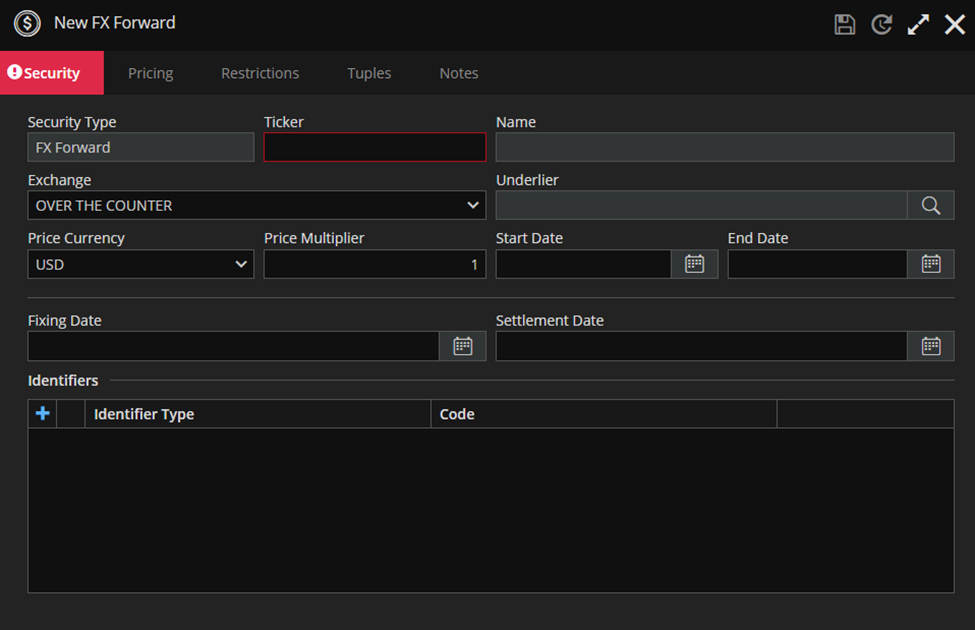
Obviously, Ticker is a required field. Also, you need to select an Underlier.
After you click on FIND SECURITY, the Select security form will pop up. You should narrow the search to FX security.
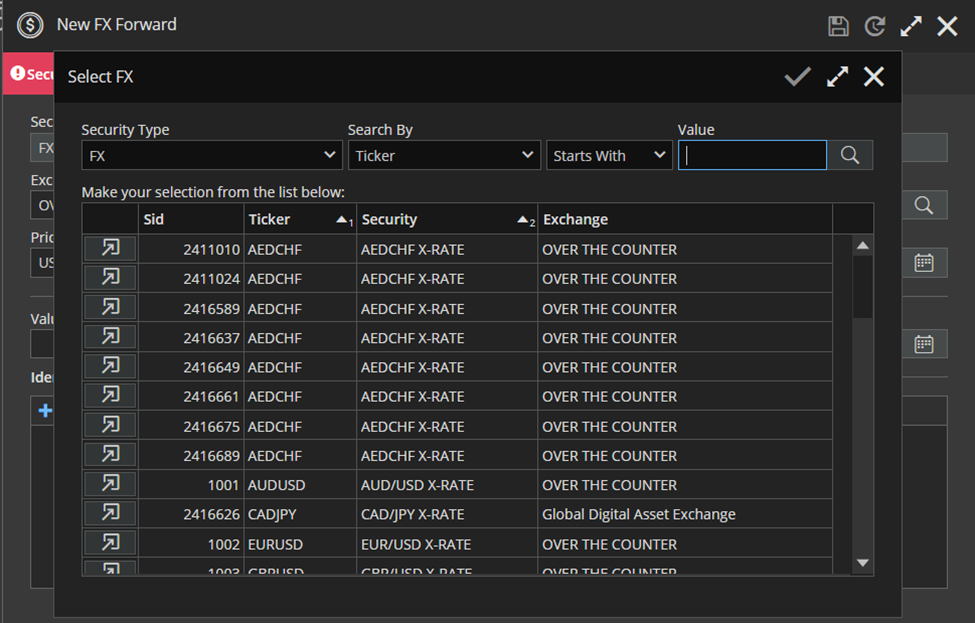
The Ticker and Name fields will get a default values after you select Underlier and Settlement Date.
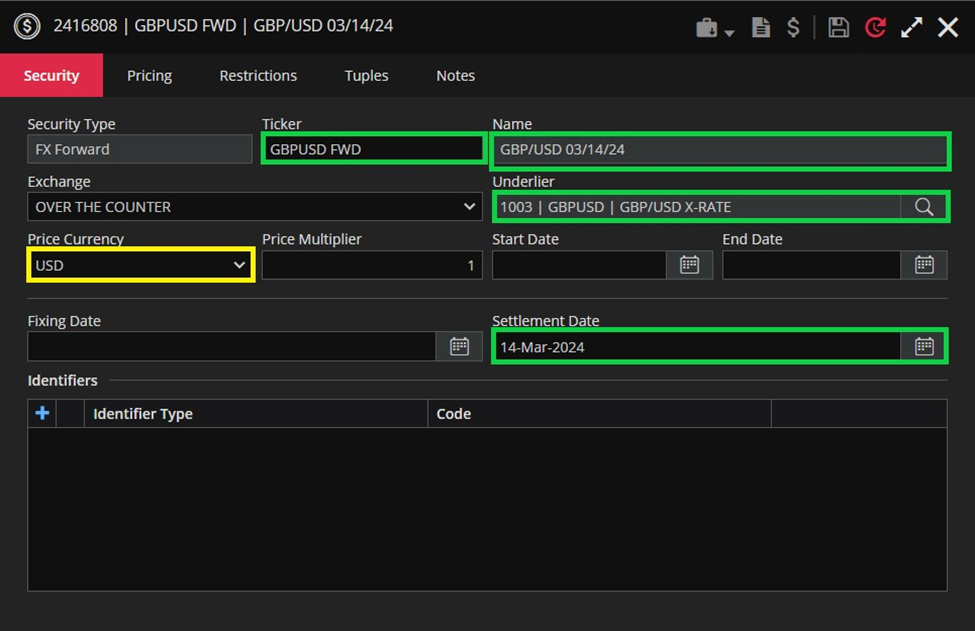
Notice that the currency should be the second (weak) currency. Now, you can save your new FX Forward security.
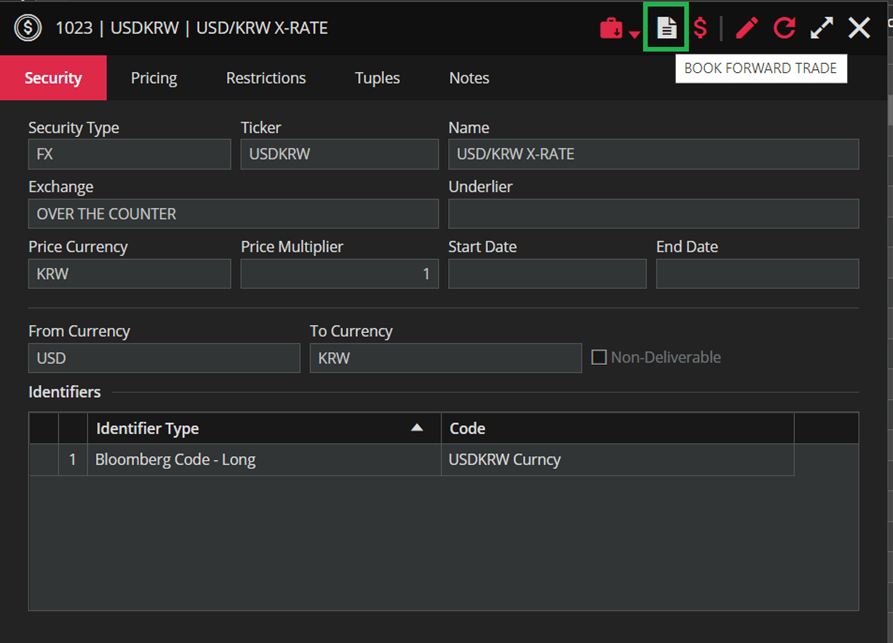
There is another way to create FX Forward security and that is by booking forward trade against FX rate which will actually be a trade against the newly created FX Forward.
After you click on BOOK FORWARD TRADE button in the FX rate security form, the new order form will pop up.
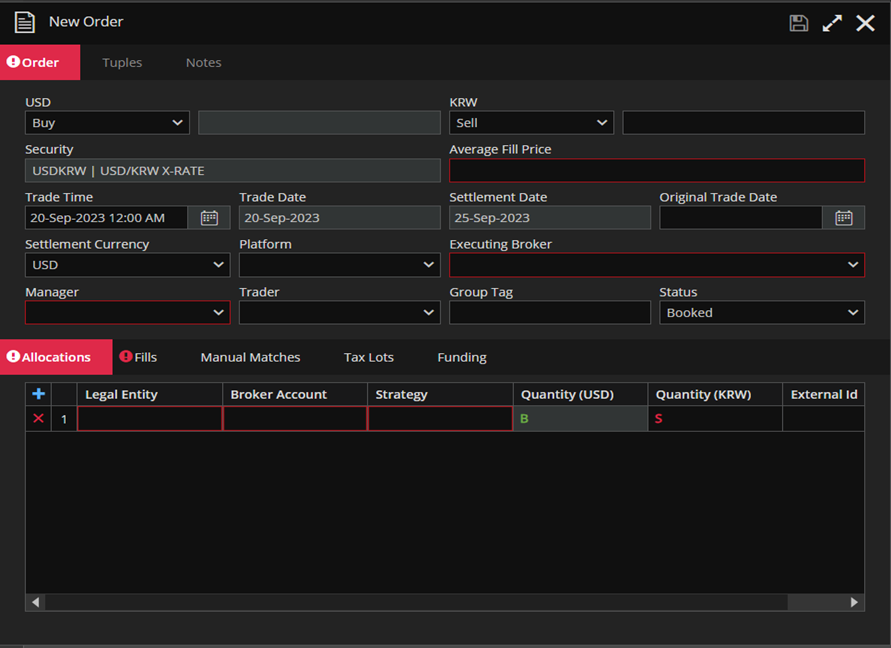
Once we populate all the fields and save the FX Forward security will be created in the background.
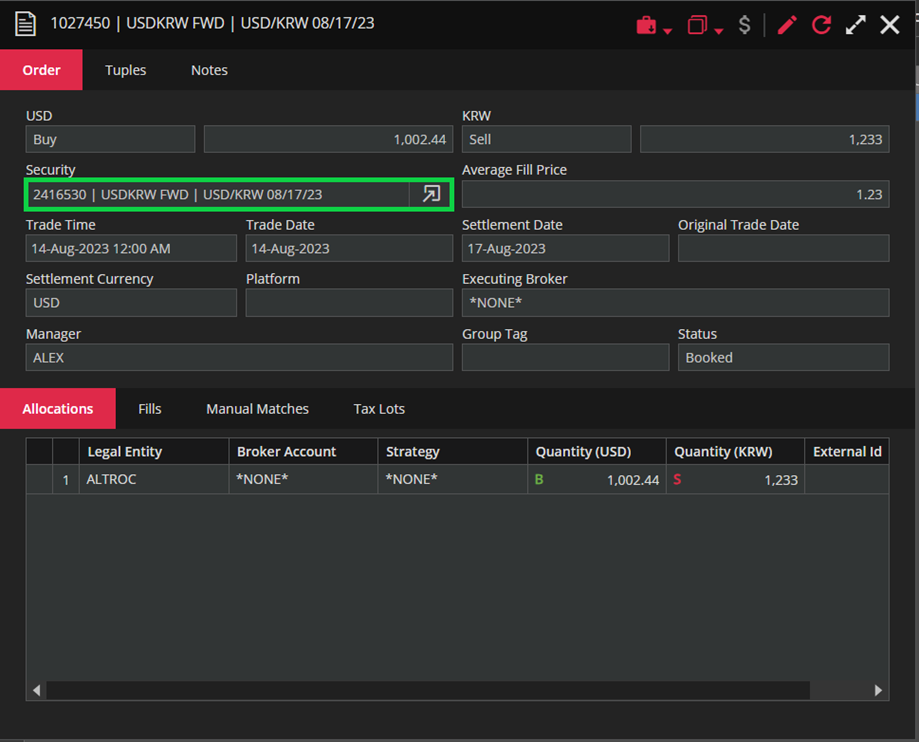
And in the screenshot above we actually have a trade against newly created FX Forward USDKRW FWD.
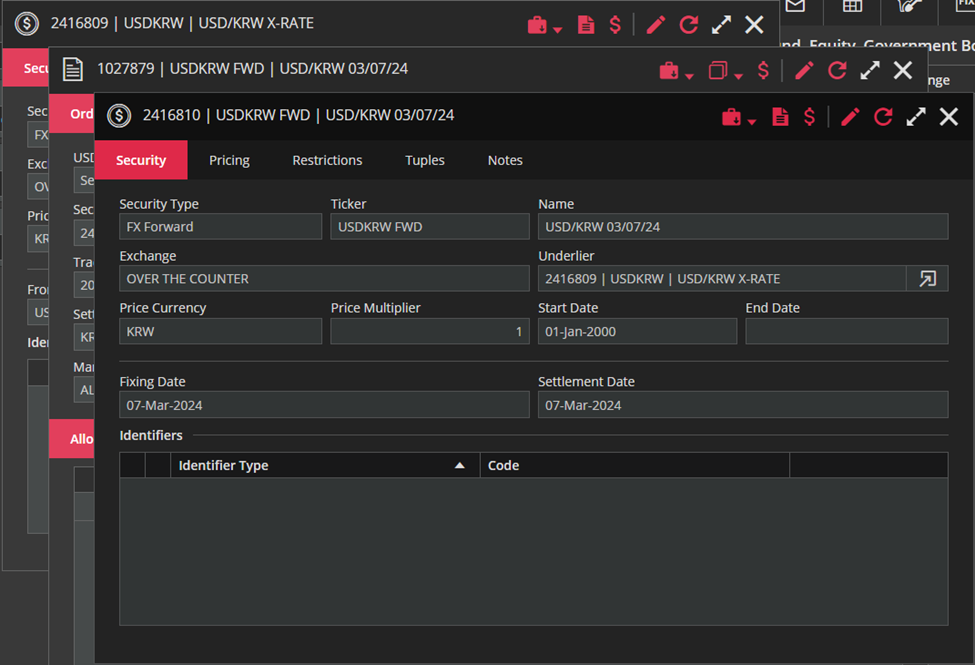
It remains to be explained how the FX Option should be created.
When we select FX Option from the CREATE SECURITY menu, the Select Underlier window will pop up. RUBY will offer you only FX Forward as an underlying security.
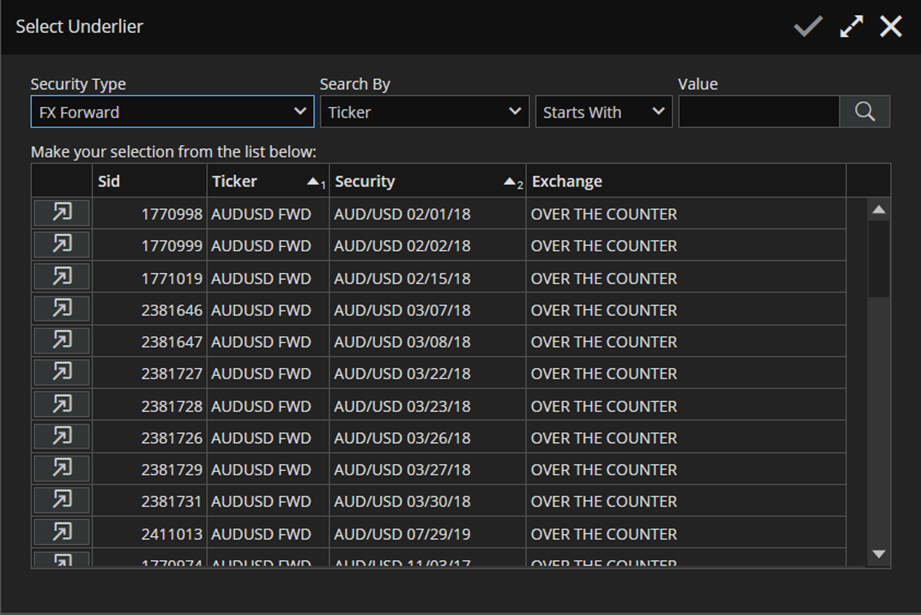
After choosing the desired FX Forward, the Add Option Details window will pop up where as in the case of all other options.
In the new FX Option is shown in the screenshot below.
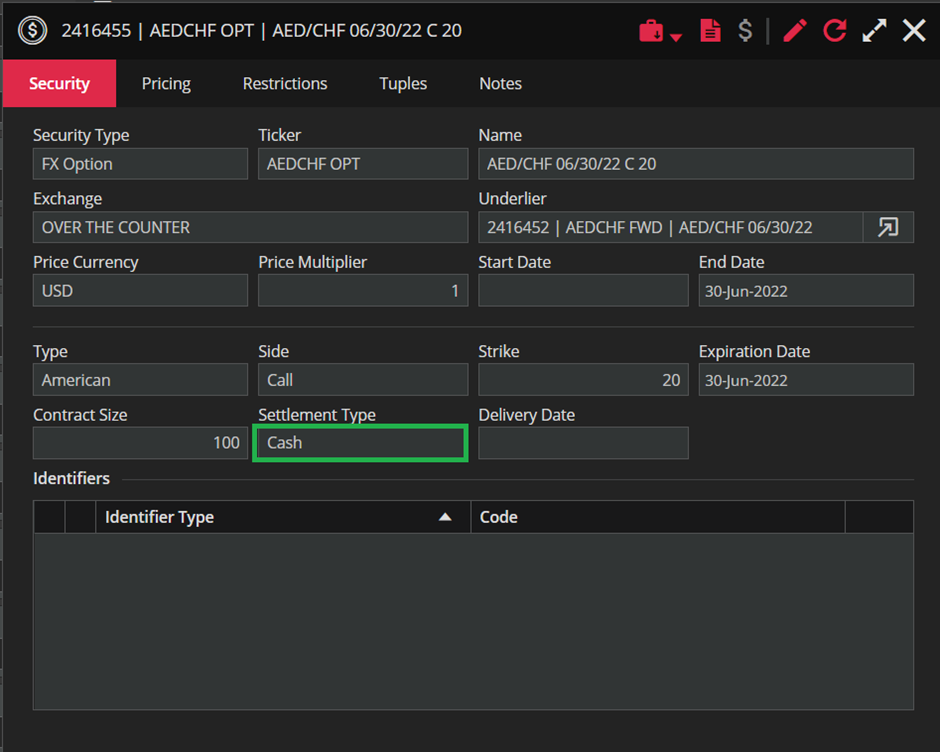
In case of these options the settlement type should be Cash.
Once created, your security will be available in the Products module. In case you want to access it later, please use filtering and searching principles described in the Product Search Section.
