
The Checklist Module gives us the space in the application where we can look at our daily responsibilities or subscriptions on reports that need to be manipulated on the scheduled day.
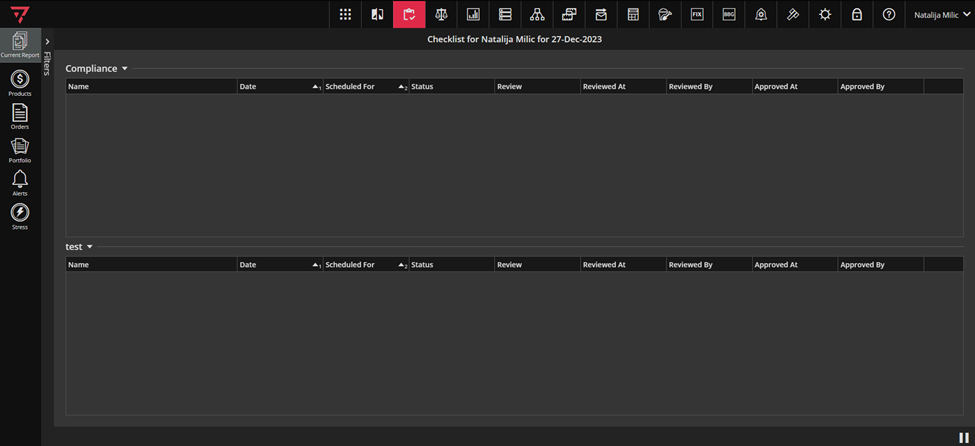
To access the Checklist module, click on this icon in the singleton modules toolbar as in the screenshot below.

The user can have a place where he/she can check out all the “Save to File” subscriptions on reports that need to be checked on that day.
In order to have some items on our checklist we need to create few “Save to File” subscriptions as described in section Subscriptions.
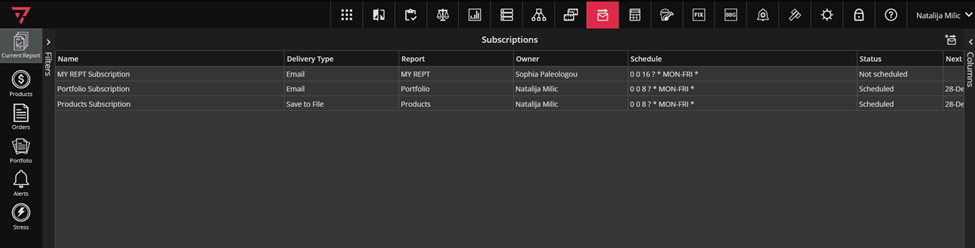
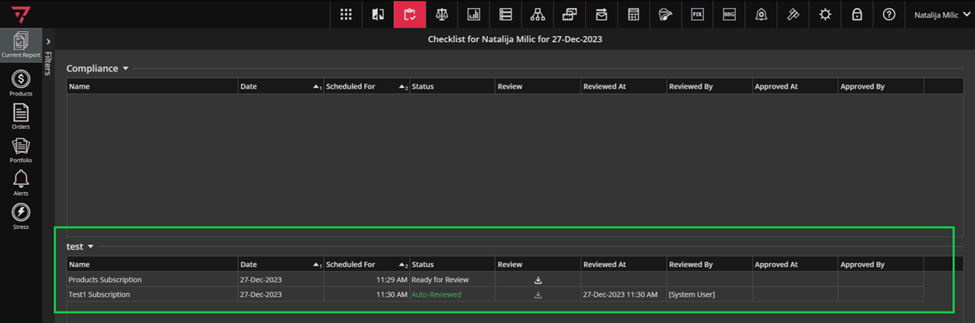
Here we can check the reports that are the result of subscriptions scheduled to run on that day.
Also, if a subscription is triggered manually the user can check the result in the Checklist module.
Of course, every user will have his own checklist.
Also, we can have a report that is shared between users.
In that case, Reviewed At should be reserved for the current user’s review, and Reviewed By should list all reviewers.
When first user reviews the report, his Reviewed At should be populated with the time he reviewed it.
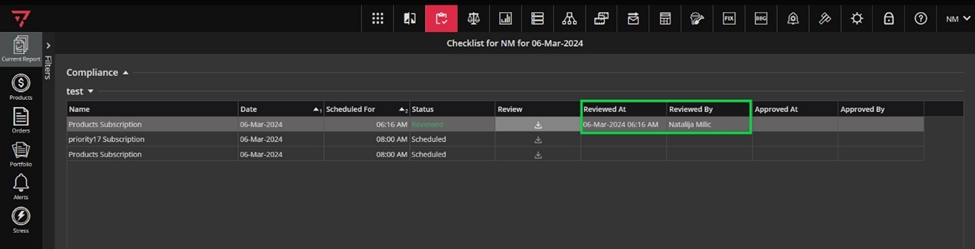
If second user has not reviewed it yet, his Reviewed At stays empty until he reviews it.
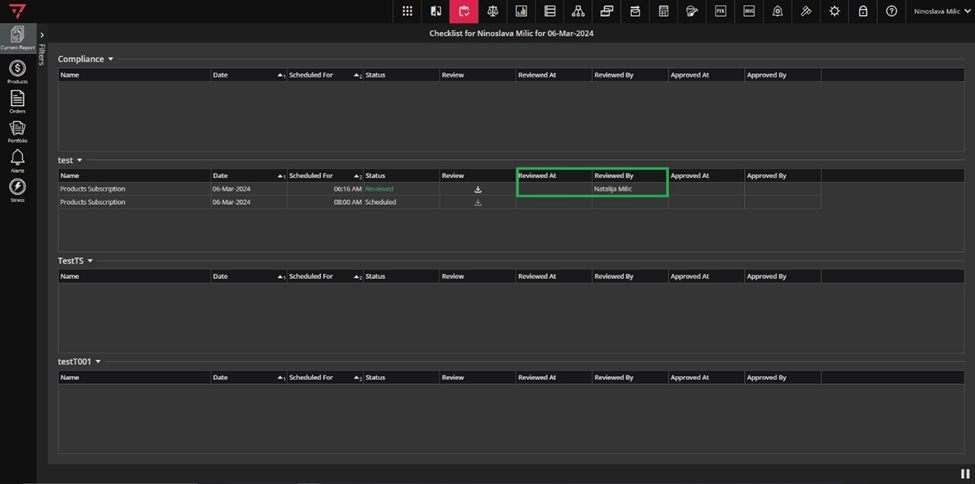
After both users reviewed the report, Reviewed By should list the names of the users who have reviewed the report so far, and is the same for both users.
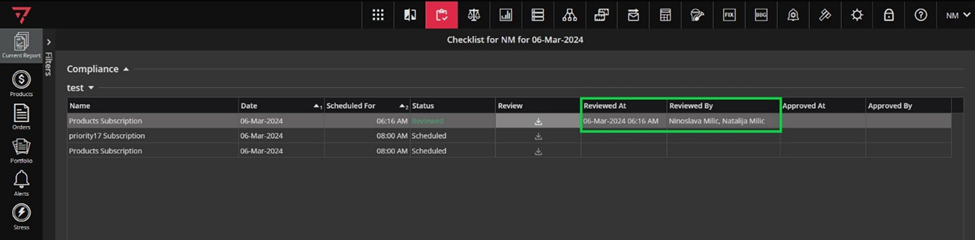
There will be a “Value Date” filter that is defaulted to the current business day. But we can select the desired date range from the dropdown menu and check all reports for selected date range.
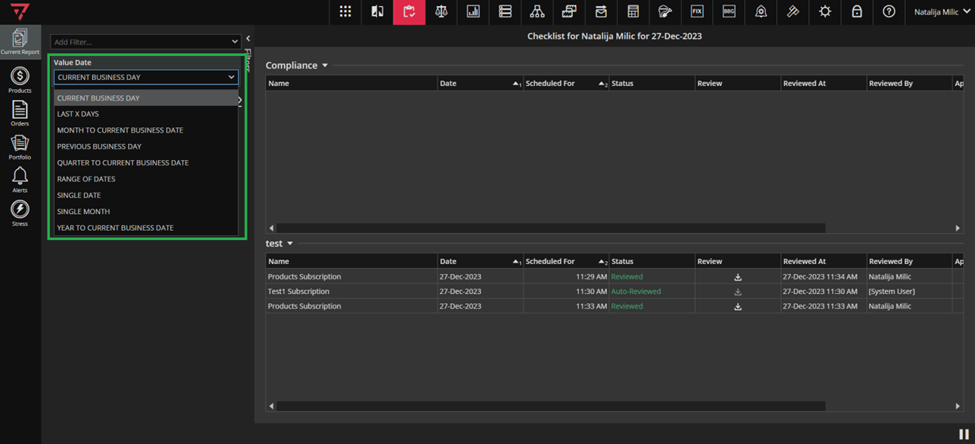
For each checklist category there is a group containing the category name and a grid containing the data regarding that checklist category. There is an option to create new category on the fly while we are creating Save To File subscription (check section Subscriptions).
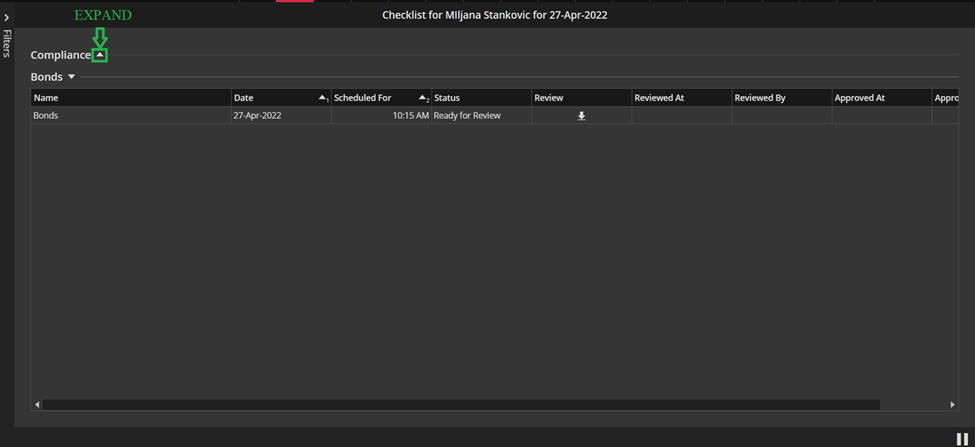
Every group can be expanded or collapsed by clicking on a small pointing arrow (see screenshot below). All checklist groups are expanded by default.
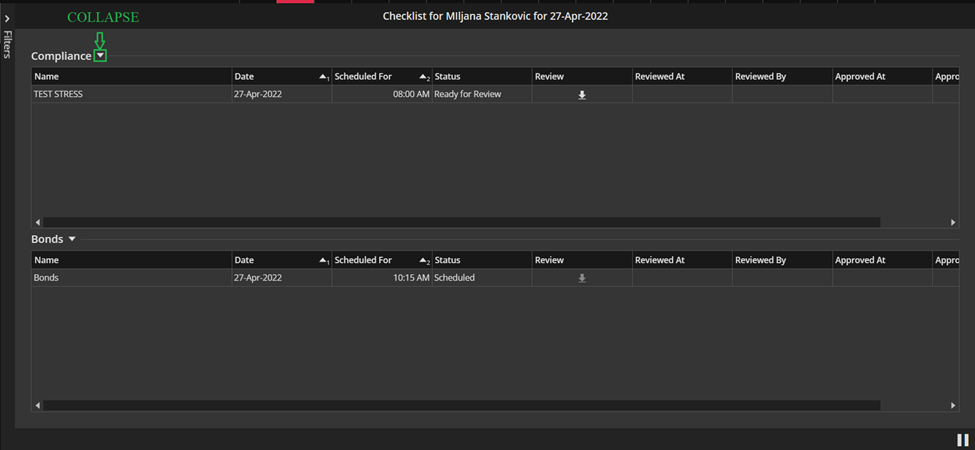
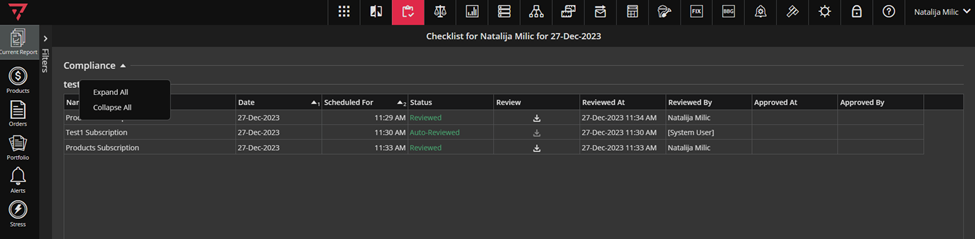
By performing the right-click anywhere in the Checklist grid we will get Expand All and Collapse All context menu actions that will expand and collapse all the groups at once.
Notice that the Checklist module always works in the streaming mode so the data is automatically refreshed.
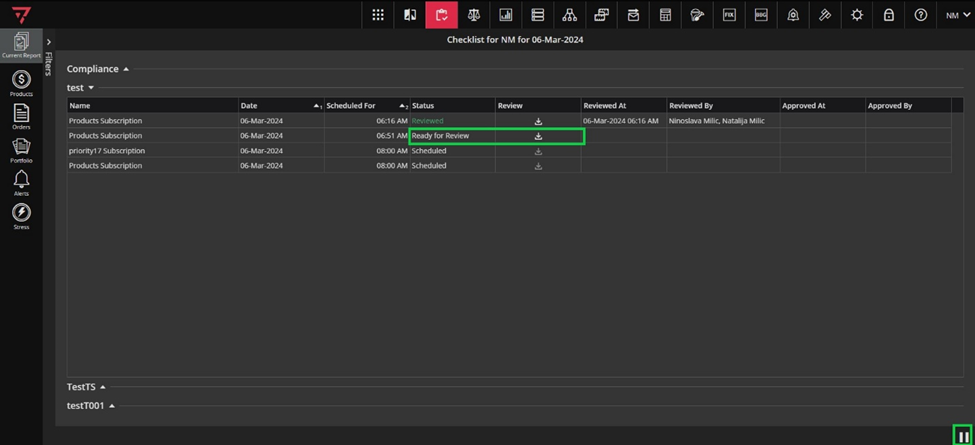
Let us now explain each of the available columns in the Checklist grid.
There is a Name column that represents the name of the specific subscription.
Date column tells us the date when the subscription is scheduled to run.
In the Scheduled For column we can see the exact time the subscription is scheduled. All resulting reports at that moment have status “Scheduled” as we can see in the Status column.
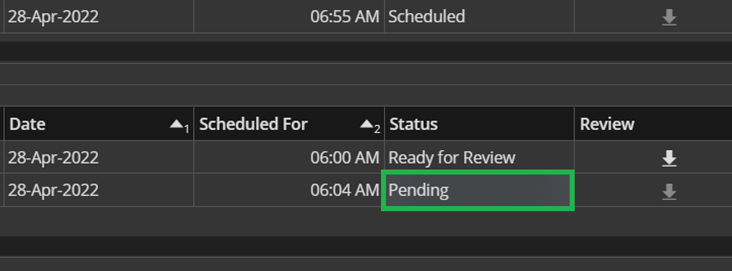
Very shortly after the subscription triggers the report will have status “Pending”. It only takes a few seconds.
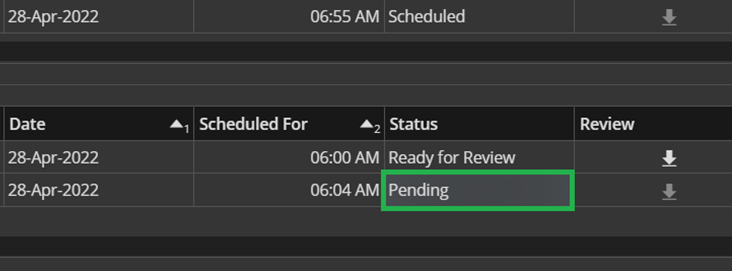
If the subscription result is an empty report then the status will be “Auto Reviewed”. There will be no report to download.

On the other hand, if the row (report) in Checklist module has “Ready for Review” status then the download button in the Review column will be enabled.

After we perform downloading the report status will be “Reviewed”.
Also the Reviewed At column will be populated with exact date and time when we downloaded the report and Reviewed By contains the name of the person who downloaded the report.

It may happen that for some reason the subscription fails. In this case, we will have “Error” status in the Status column.

