Valuation module allows you to set new and manipulate with existing Scheduled Tasks, Valuation Modes and Stress Scenarios and to define/work with Curves.
To access the Valuation module, click on the icon marked green in the singleton modules toolbar, as shown in the screenshot below.

By clicking on the module`s icon, screen opens like in the screenshot below.
There are four tabs in the Valuation curtain: Scheduled Tasks, Valuation Modes, Stress Scenarios and Curves.
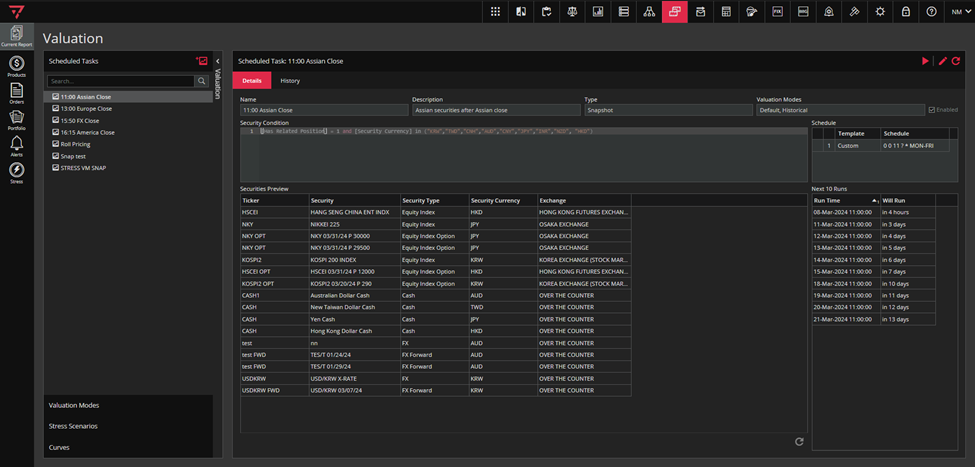
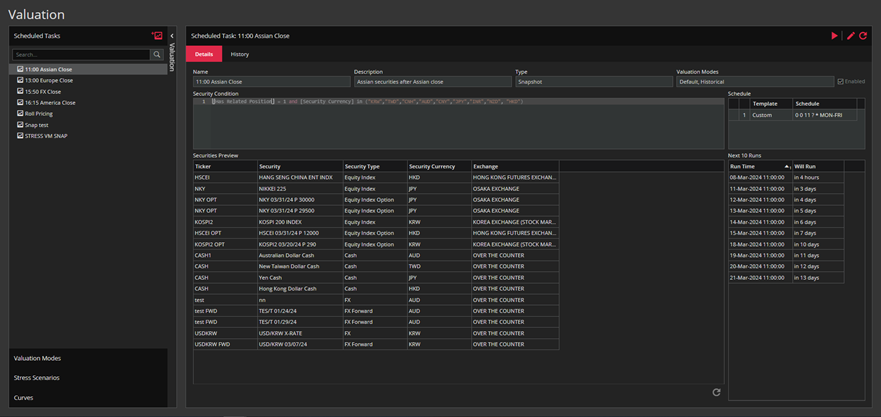
When you click on scheduled task from the Scheduled Tasks tab you get necessary information in the right container, divided into two tabs: Details and History.
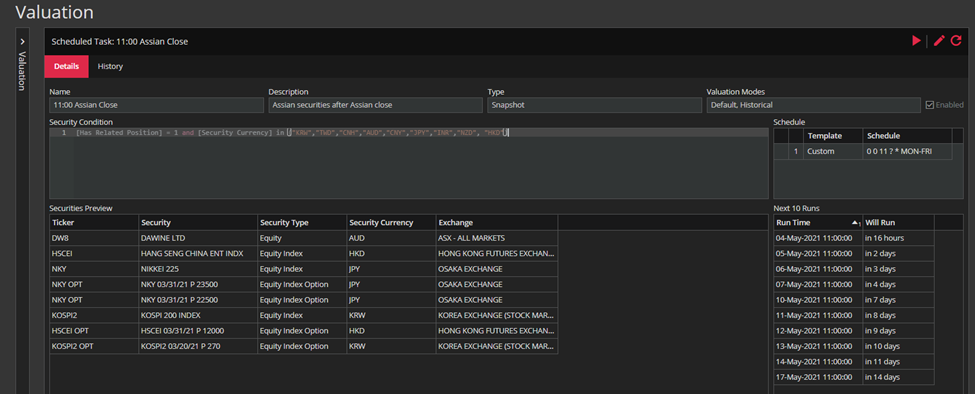
The Details tab contains Name, Description, Type and Valuation Modes fields, Security Condition and Schedule sections, as well as the Securities Preview and the Next 10 Runs information in the bottom section of the screen.
The Securities Preview shows you the instruments your query will be fetching.
The Next 10 Runs shows you the dates and times when the next ten executions will occur.
The Schedule section shows the schedule itself. You can run tasks manually too, by clicking on the RUN button any time needed.

When a scheduled task is run, then a certain action is performed. For example, when an 11:00 Asian Close scheduled task is run, the prices for the securities your query is fetching are populated. The prices are populated for valuation modes in the Valuation Modes field of the scheduled task.
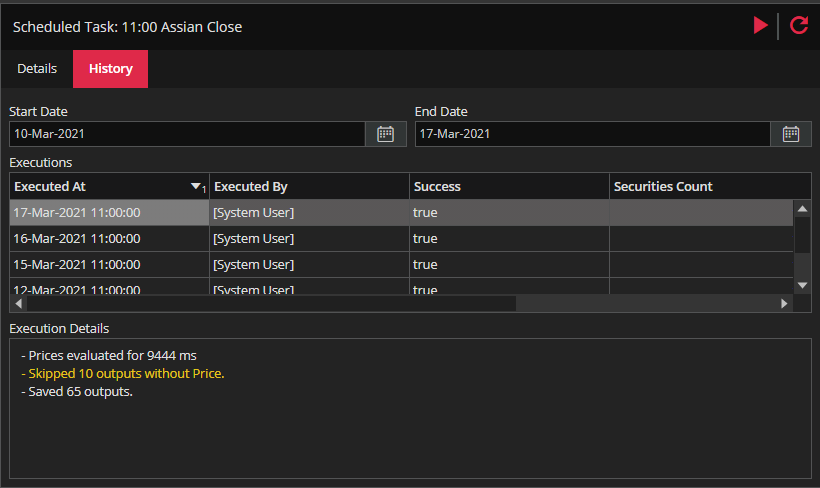
In the History tab, you can set Start/End Date filters and see previous runs for selected date range. The quick-grid below contains columns Executed At, Executed By, Success etc. When you select one of the rows in the Execution Details grid, you get the necessary details about execution (see screenshot below).
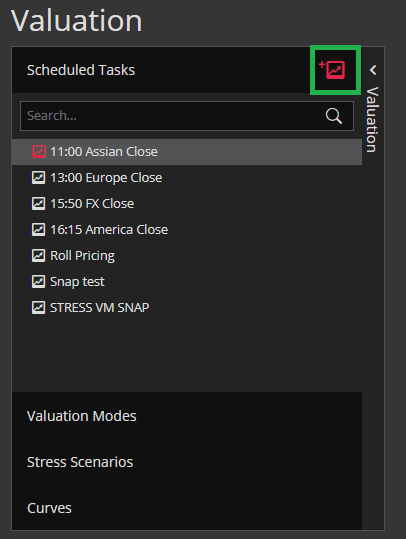
Clicking on the “ADD SCHEDULED TASK” icon, located in Scheduled Task tab`s right side of the header, opens a new form for creating scheduled task on the right side of the screen.
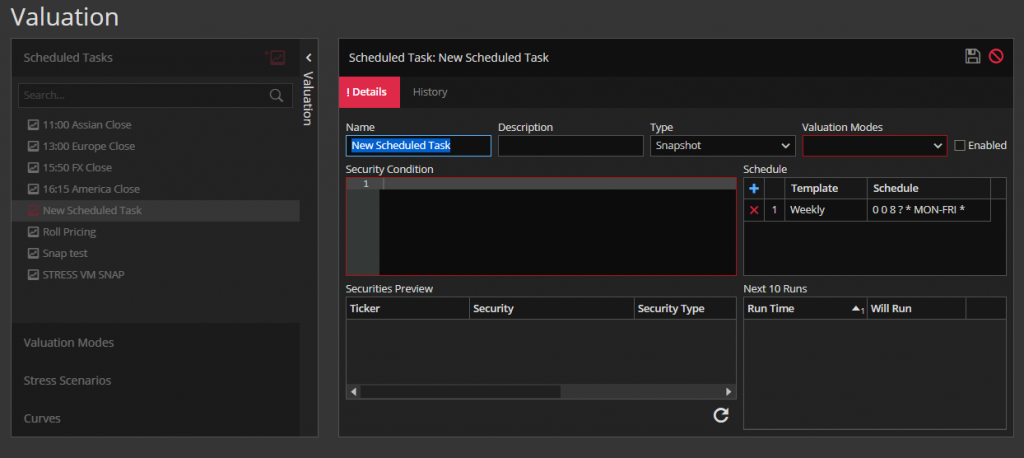
Required fields have a red border and you need to provide inputs for them at the minimum, in order to be able to save your new Scheduled task.
You can delete the scheduled task by clicking on the “X” next to the scheduled task name.
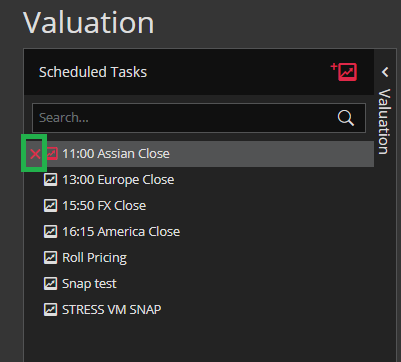
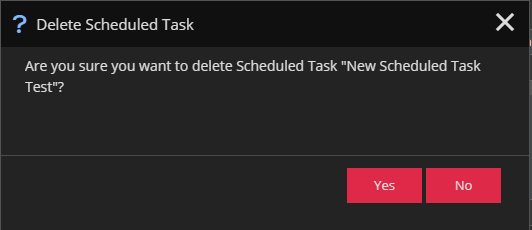
After you click on the “X”, a confirmation message will pop-up asking if you are sure you want to delete the scheduled task. If you click “No”, nothing will happen. If you click “Yes”, the task will be deleted.
By clicking on a particular valuation mode in the Valuation Modes tab, you can see the Name, Type, Base Mode and Code section (see screenshot below).
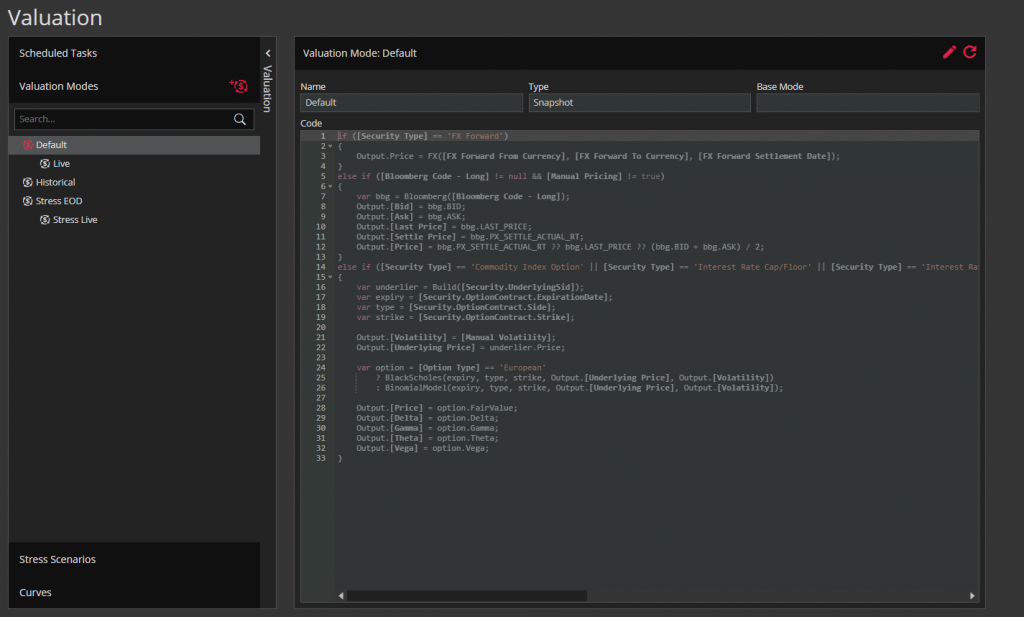
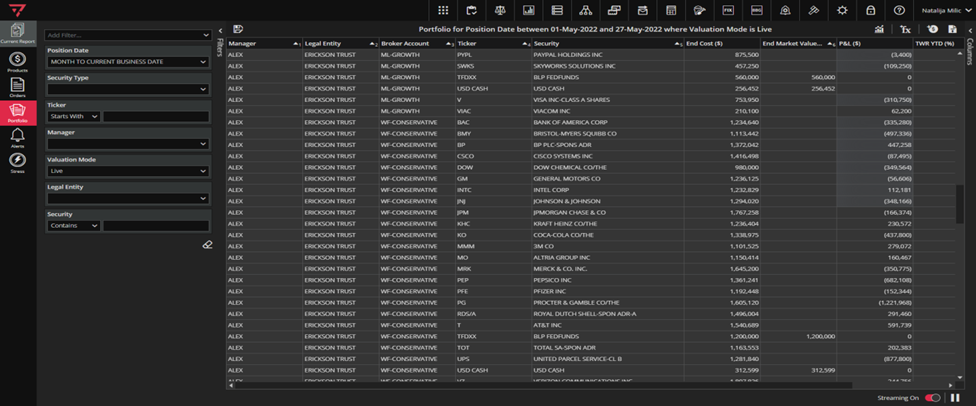
The valuation modes are used in the Portfolio and Stress module to update all columns that use prices. When you choose a certain valuation mode then the prices for securities will be updated according to the selected valuation mode. Therefore, the values in all columns affected by the price will change.
Let’s say you are in the Portfolio module, streaming is on and you have set the valuation mode at Live. Then you will notice that the affected fields in the grid are highlighted a few moments (see screenshot below).
By using the Edit button in the upper right corner, you can edit the selected valuation mode.
You also have the option to add a new valuation mode by clicking on the “ADD VALUATION MODE” button located in the header of the Valuation Modes tab.
After clicking the “ADD VALUATION MODE” button, a pop-up appears like in the screenshot below and the user can choose the valuation mode name and the valuation mode type from the list (valuation mode type is a required field in the pop-up form).
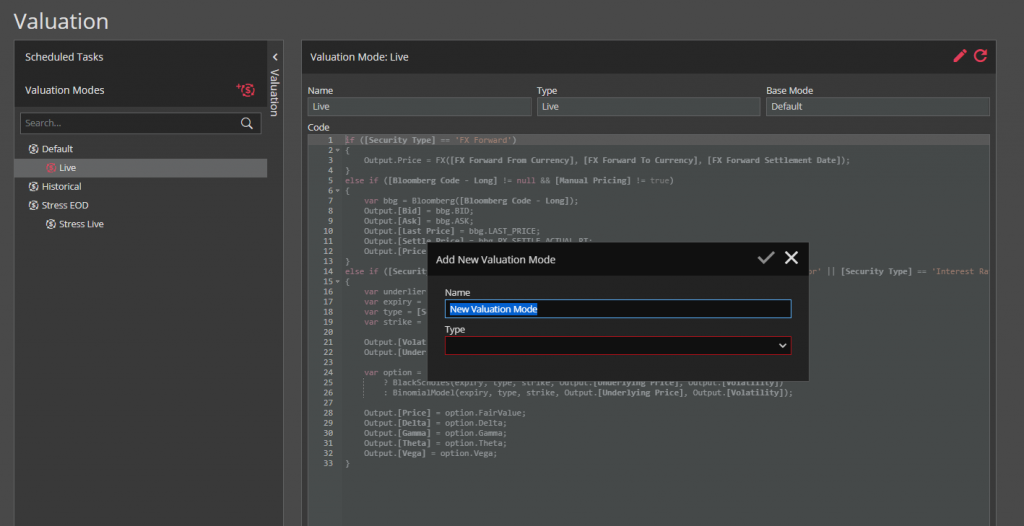
By choosing the name and type of valuation mode and by clicking on the “APPLY” button, the form for creating a new valuation mode opens on the right (see picture below).
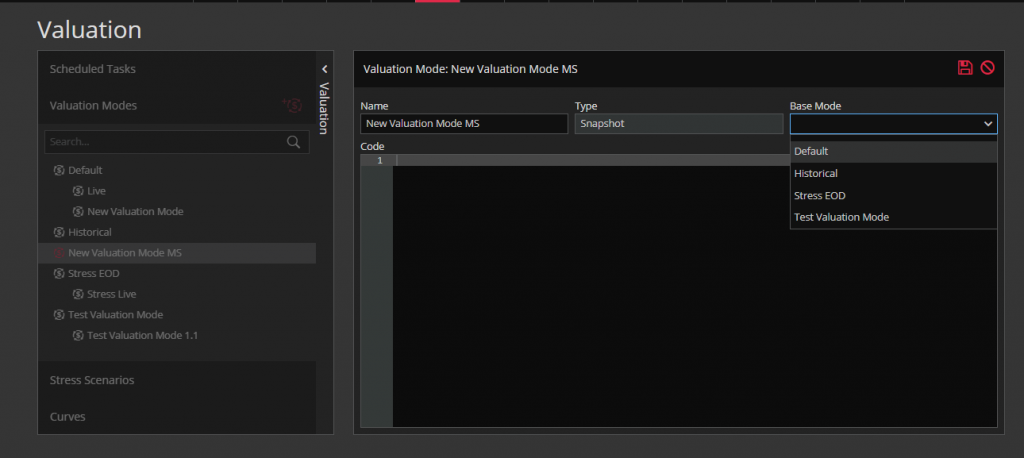
When the user chooses the Base Mode and inserts suitable code in the Code section then he gets new valuation mode.
The user can delete valuation mode in the same way as scheduled task which is described above.
Stress Scenarios tab contains different stress scenarios. When you click on some stress scenario you get all the necessary information in the right screen`s section.
The stress scenarios are used in the Stress module to shock the prices in the manner described in the Shocks section (see screenshot below).
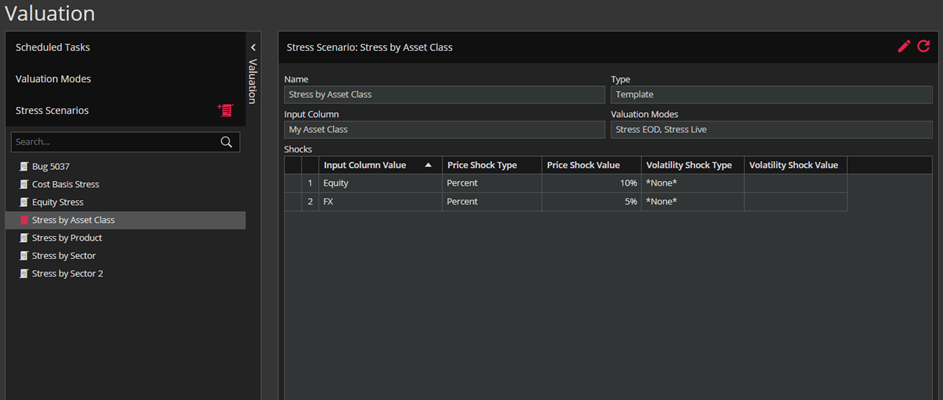
You can read a more detailed explanation on how stress scenarios work in the section Stress module.
There is an option to edit the selected scenario by clicking on the Edit button in the upper right corner of the stress scenario section.
By clicking on the “ADD STRESS SCENARIO” button, a pop-up form appears like in the screenshot below.

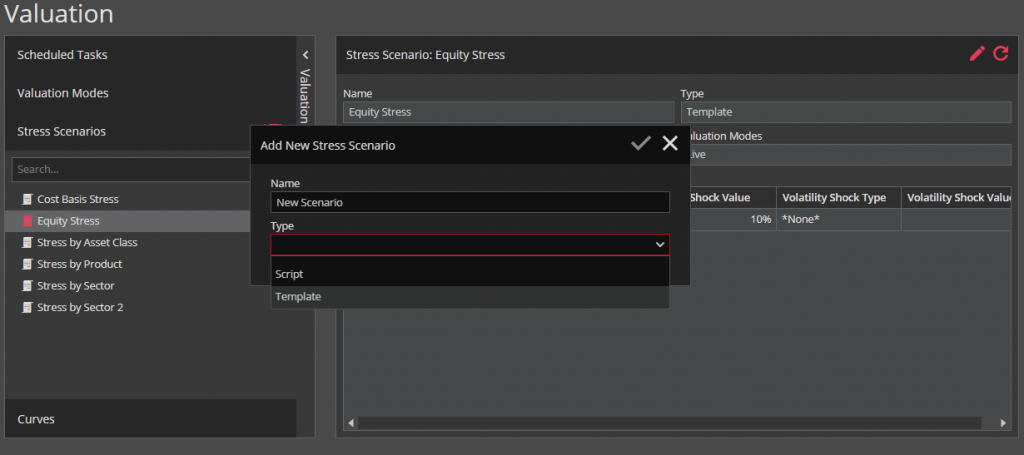
After you enter name and chose the stress scenario’s type, click on the “APPLY” button marked with green in the screenshot below.
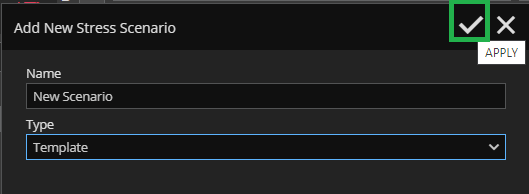
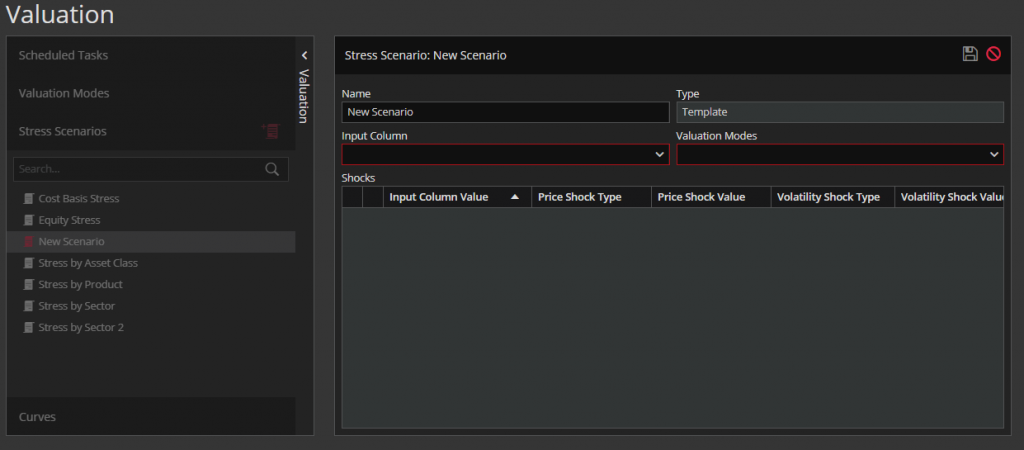
After clicking on the “APPLY” button, the form for the new stress scenario opens. The required fields are marked with the red border.
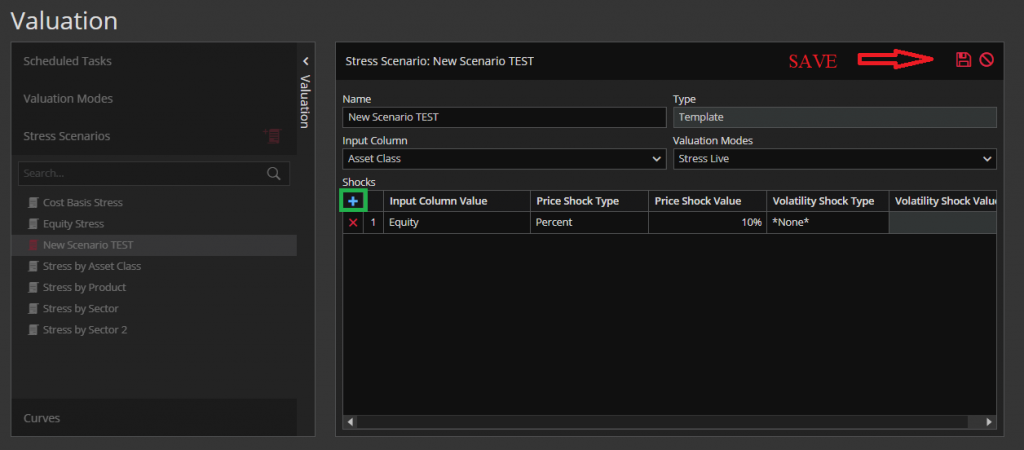
When the user fills in all the required fields by choosing values from the the dropdown list and by adding shocks in the Socks section by clicking on the button marked with green rectangle in the screenshot below, then the “SAVE” button will be enabled, so the user can save new stress scenario.
You can delete the stress scenario by clicking on the “X” button next to the scheduled task name.
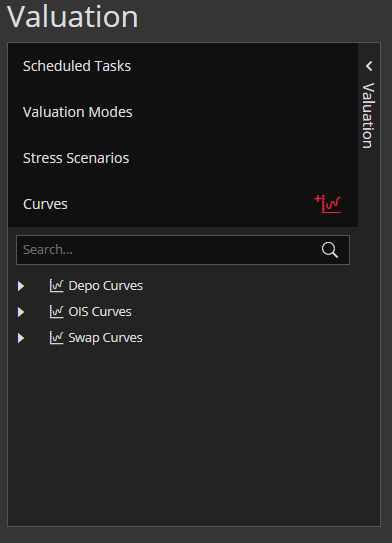
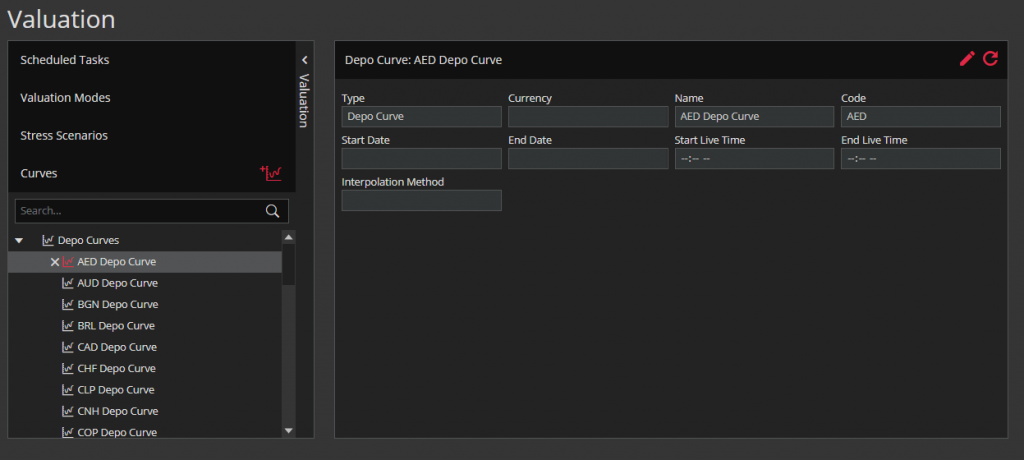
The last tab in the Valuation curtain is the Curves tab. There are three types of curves: Depo Curves, OIS Curves and Swap Curves.
By clicking on the arrow next to the curves on the left, you can see all the curves of the selected type (say Depo Curves). When you select a curve, the right section will show more detailed information about the selected curve.
You have the option to edit a selected curve by using the Edit button.
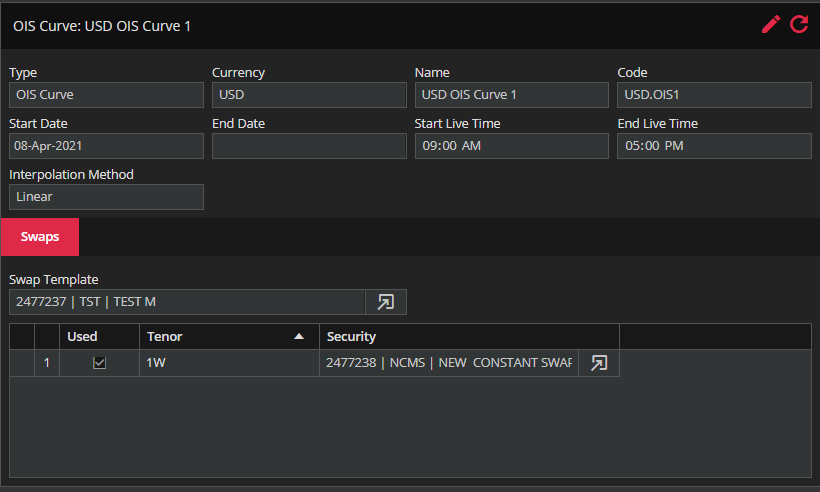
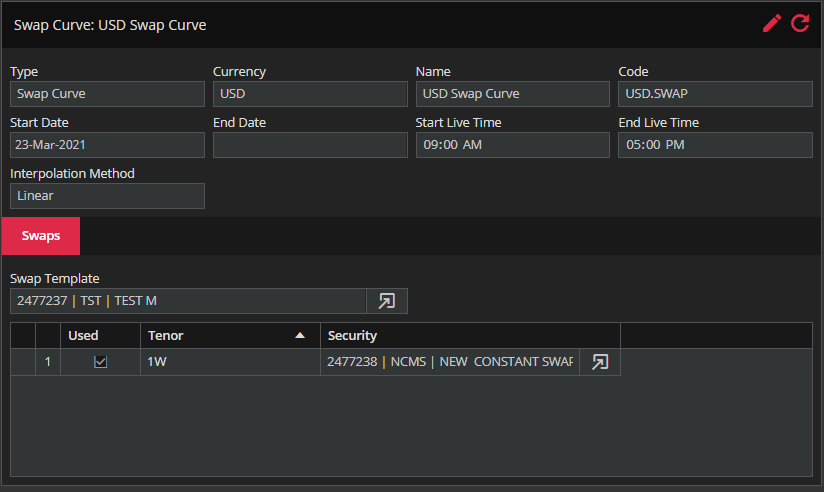
Examples of the OIS Curve and Swap Curve:
In the Curves tab header, you have a button to create a new curve.
By clicking on the “ADD CURVE” button, the pop-up “Add New Curve” form will appear.
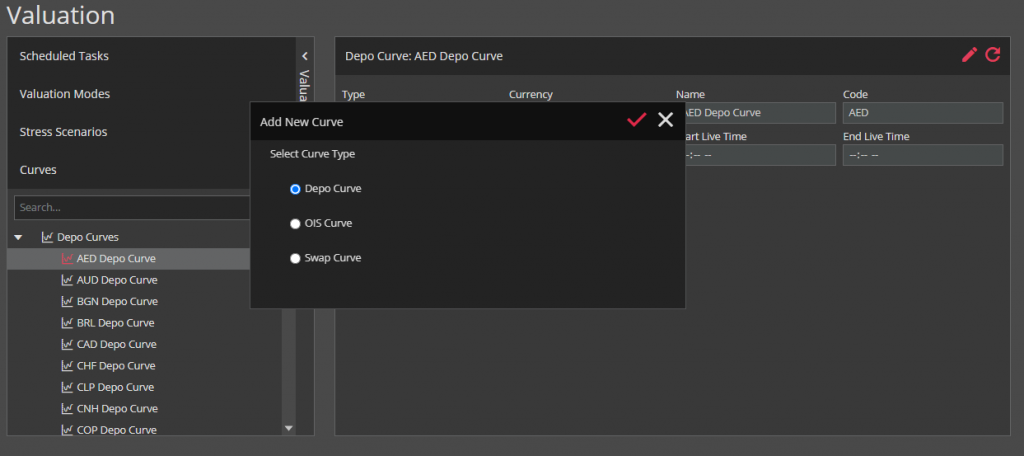
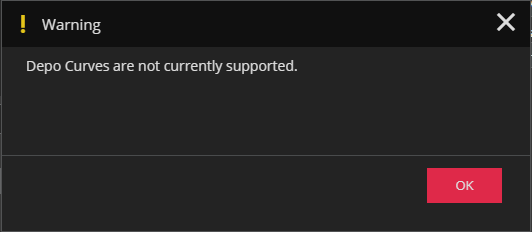
There is still no support for creating a curve of type Depo Curve. Therefore, if you select Depo Curve and click on the “APPLY” button, a warning message will appear saying “Depo Curves are not currently supported”.
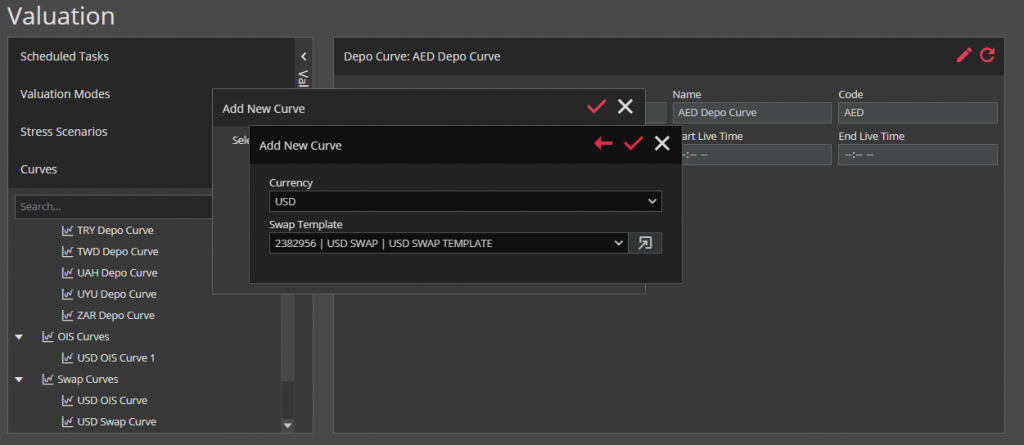
After you select the curve type (OIS Curves or Swap Curves) and click on the “APPLY” button, you will get the new pop-up “Add New Curve” form (see screenshot below) and you will have to choose a Currency (required field) and a Swap Template from the dropdown list.
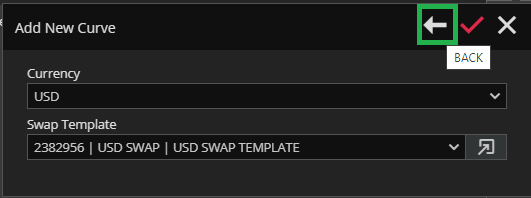
You have an option to go back if you have changed your mind and you want to change the curve type by clicking on the “BACK” button marked with the rectangle in the picture below.
There is also the possibility to see the Swap Template security by clicking on the “VIEW SECURITY” button. If you want to continue, then click on the “APPLY” button and the new curve section will appear. Now, you can click on the “SAVE” button to get the new curve.
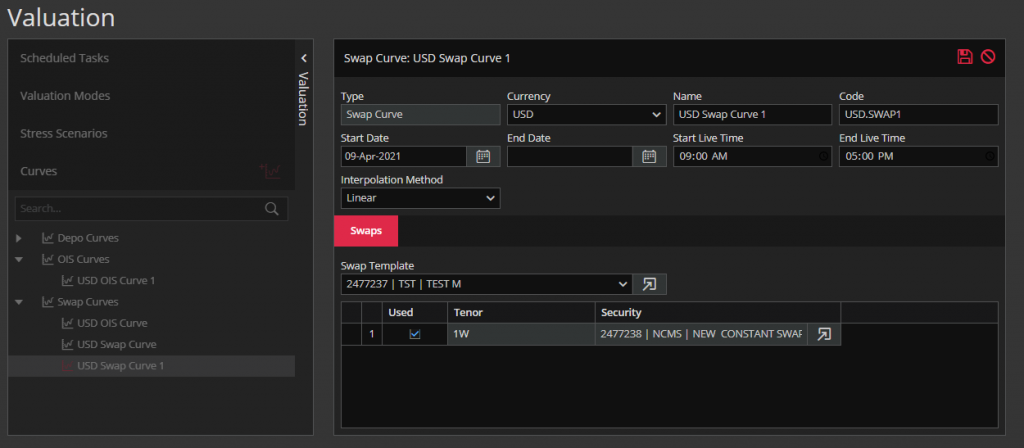
When the curve form is in Edit mode and you hover over the name of the Swaps tab, the “X” button will appear, so you can remove the Swaps.
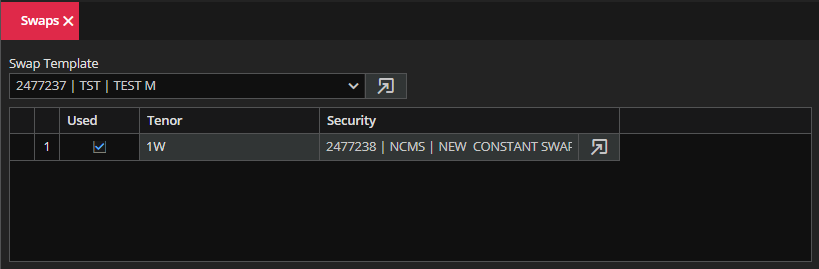
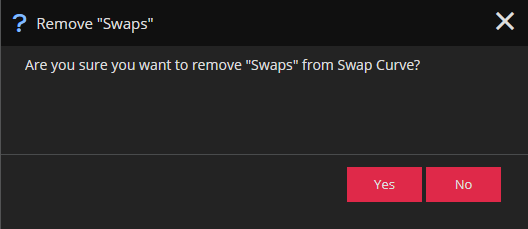
After you click on the “X” button, the confirmation message appears.
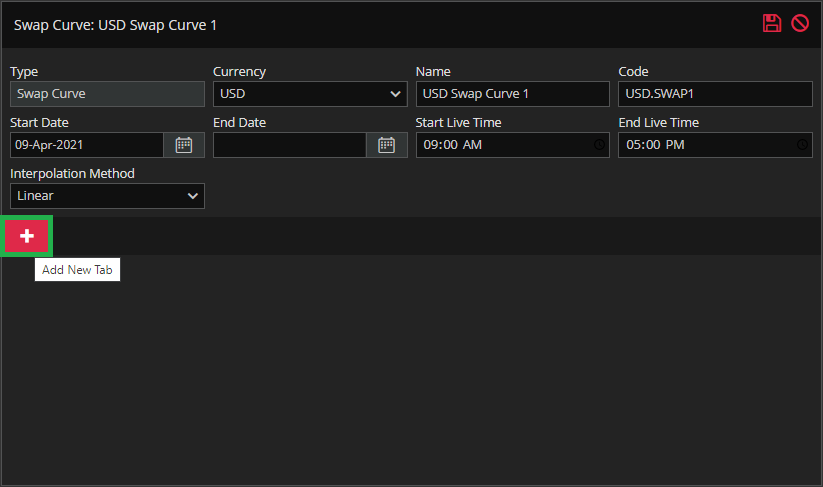
You also have the option to add a new tab by clicking on the “Add New Tab” button marked with green in the screenshot below.
*If by any chance you do not have securities of type Swap Template and Constant Maturity Swap, you will not be able to create a new OIS Curve or Swap Curve. In that case, you can navigate to the Products module and create those by clicking on the “CREATE SECURITY” button.
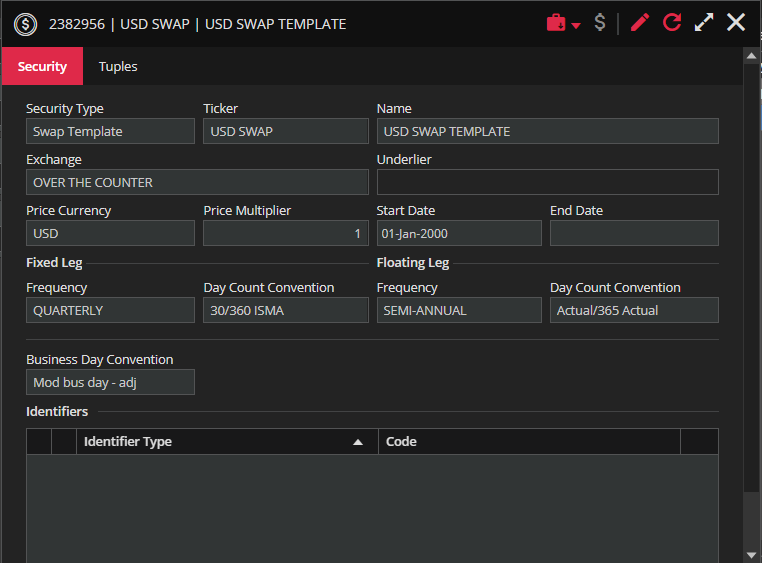
You first create a Swap Template security and then a Constant Maturity Swap using the Swap Template which you have previously made.
Example of a Swap Template:
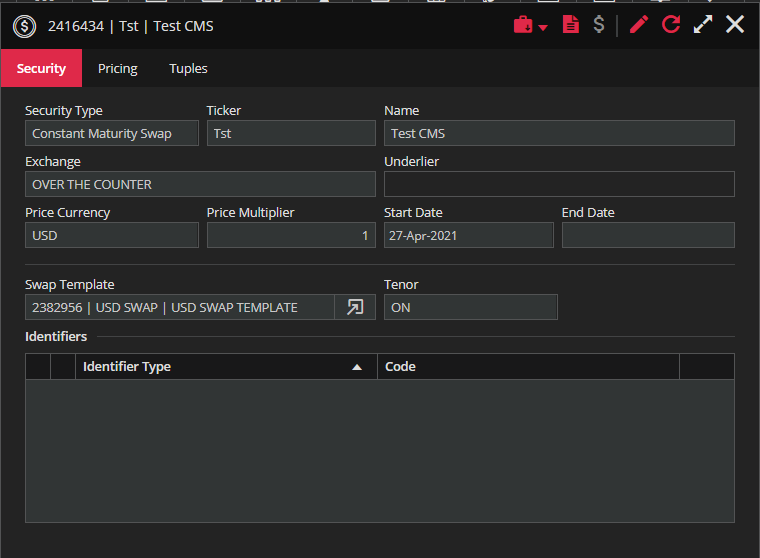
When creating a Constant Maturity Swap the “Add Constant Maturity Swap Details” pop-up will appear. By selecting an existing Swap Template, the Tenor field becomes a mandatory field.
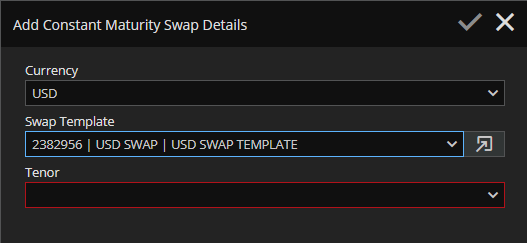
After choosing a Tenor and clicking on the APPLY button (which is active now), the form for new Constant Maturity Swap appears.
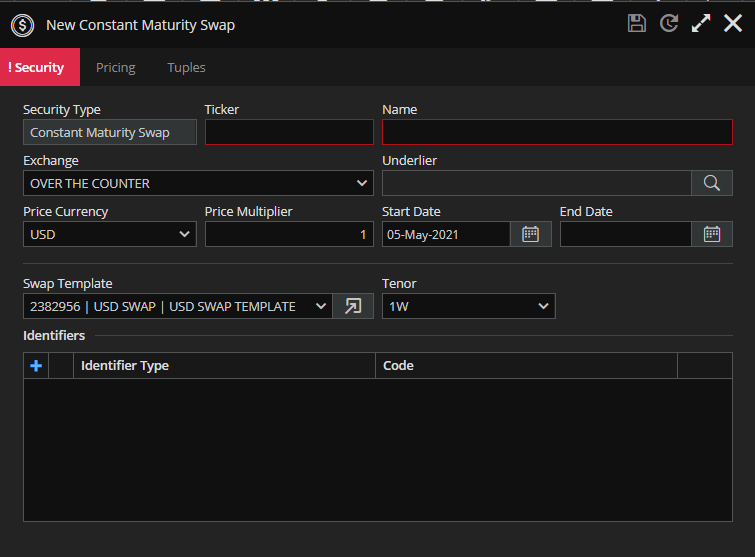
Example of a Constant Maturity Swap: