
ETL module is the part of the application that will help you setting processes that will run automatically to perform the chosen actions automatically, instead of you, at the scheduled times. You can use it to send subscriptions, create orders and new instruments, populate tuples, etc.
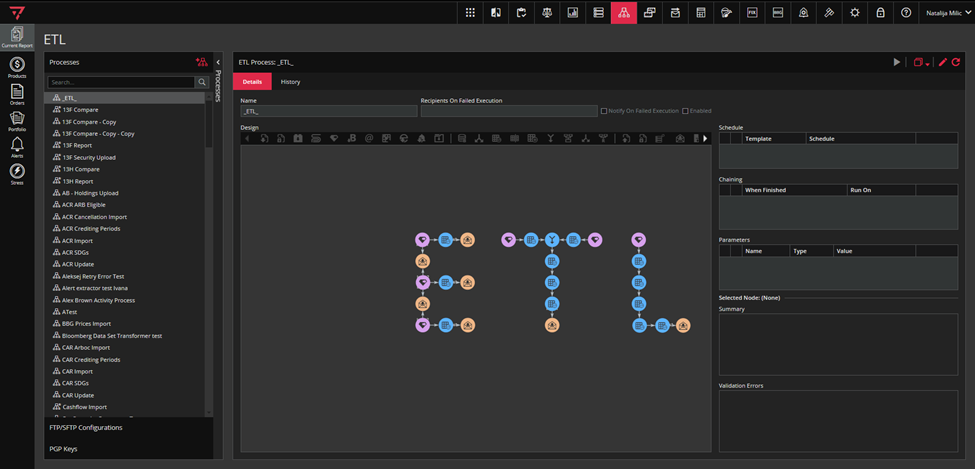
To access ETL module, click on the icon marked green in the singleton modules toolbar, as in the screenshot below.

The module looks like in the screenshot below.
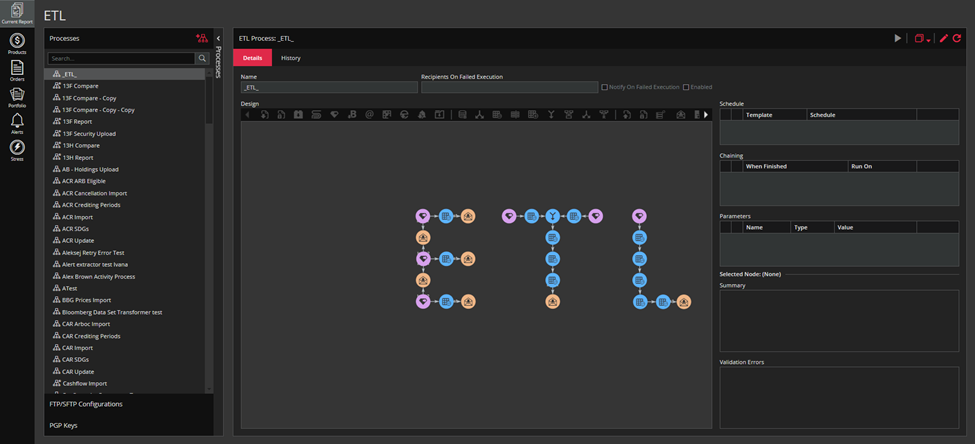
You will see three tabs on the left side.
The first one- Processes, is the list of all processes. The second one- FTP/SFTP Configurations, is for supporting Global FTP Credentials that could be used in FTP/SFTP nodes in ETL. The third one – PGP Keys, is used to encrypt and decrypt files.
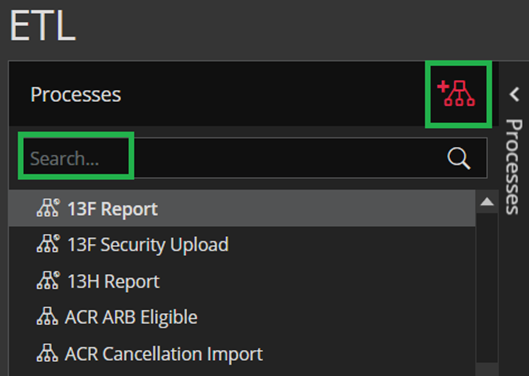
Clicking on the “ADD ETL PROCESS” button located in the header Processes of the Processes curtain on the right opens a new form for creating ETL processes, while Search box let you find desired processes faster. Both depicted in the screenshot bellow.
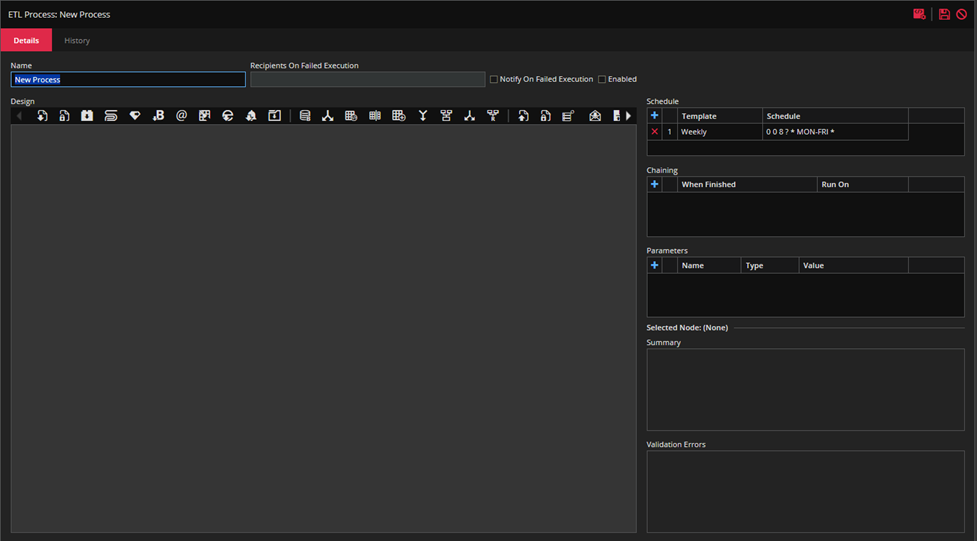
Process name is entered in the Name field.
Recipients On Failed Execution field will allow you to choose which user should receive the information about the failed process via e-mail. This field is enabled only when you checked Notify On Failed Execution checkbox.
Initially, when you are creating new process, Notify On Failed Execution isn’t checked.
After Notify On Failed Execution is checked, Recipient On Failed Execution is enabled and mandatory.

Ruby will allow you to choose one or more recipients from the dropdown menu.
When the Enabled checkbox is not checked (meaning that the process is disabled and will not be running), Ruby will allow you to save draft versions of your ETL Processes even if you are not passing validation points.
In case when Enabled checkbox is checked, the process will start right after clicking on RUN button.
Design section (also known as nodes bar) offers us all options there are. We can list the offered nodes using the arrows on the left and right of the nodes bar.

Node section is divided into several sections.
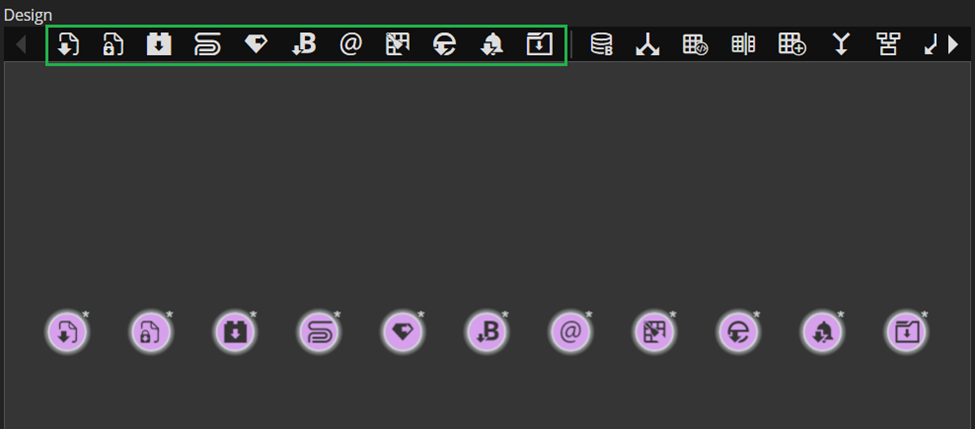
In the first section we are offering extractor nodes. These nodes are: FTP Extractor, SFTP Extractor, Input Extractor, Statement Extractor, Ruby Query Extractor, Bloomberg File Extractor, HTTP Extractor, GSF Scraper Extractor, Enfusion Extractor, Alert Extractor and File System Extractor node.
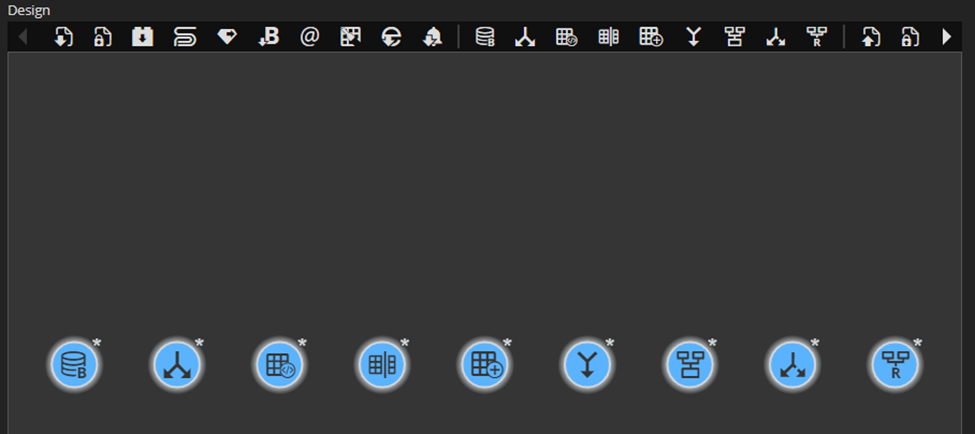
In the second section, Ruby offers following nodes: Bloomberg Data Set Transformer, Binary Condition, Script, Select, Query Expander, Union, Match Until Total, Path Decision and Reconciliation.
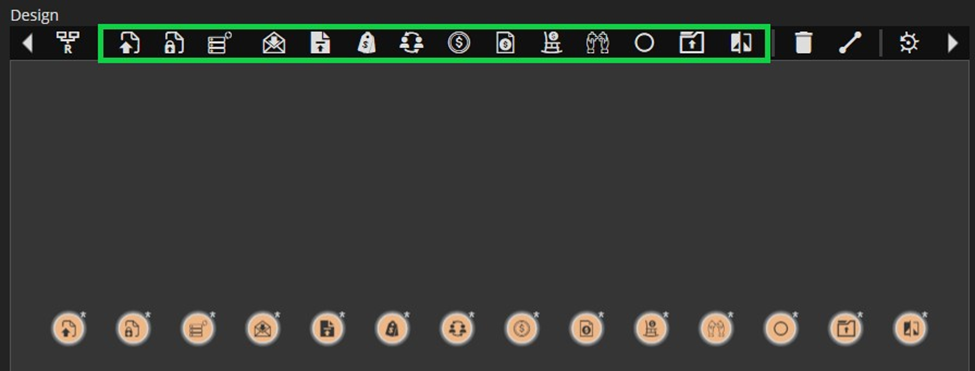
In the third section, Ruby offers output nodes. These nodes are: FTP Loader, SFTP Loader, Tuple Space Loader, Mail Loader, Order Loader, Pricing Loader, Exchange Loader, Security Loader, Fill Loader, Issuance Item Loader, Manual Match Loader, Discard Loader, File System Loader node and Reconciliation Loader node.
Further, we have a little recycle bin that serves us for removing selected node.

Clicking on the node or on the relation between two nodes, and then clicking on the bucket, you will delete the selected item.
By clicking on the relation icon (marked with green in the screenshot bellow), you enable the interconnection of nodes. In order to connect two nodes, you need to click on one and while holding the click, drag the arrow to the other node, and then release the click.

If you do not click on the Default Layout, we set the default appearance of the ETL graph.

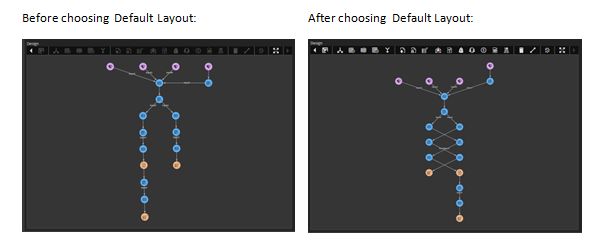
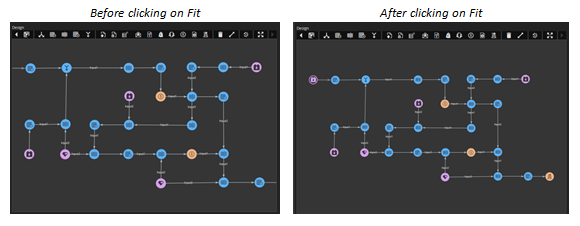
By clicking on Fit, you will adjust the display of the ETL graph, so that the whole graph is shown in the centered part of the screen and you will not need to scroll around.

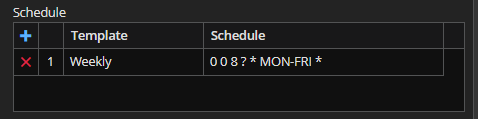
The Schedule section serves to schedule process` execution times using Cron expression.
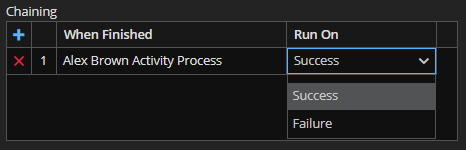
In the Chaining section, you can connect the processes to be chained (they can be run one after the other automatically).
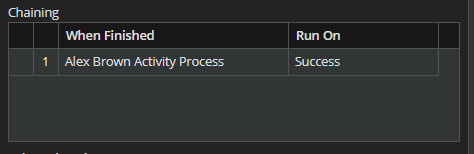
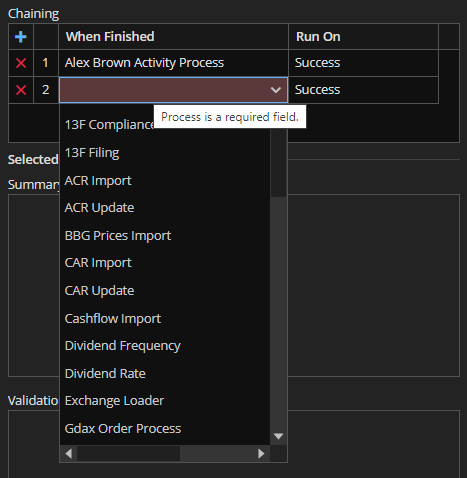
In the field in the When Finished column, select the process after which you want this process to be executed. In the Run On field, you choose whether you want the process to be started if the previous one failed or succeeded execution.
In the Parameters section, you can set global variables that you can use across all the configurable nodes (such as FTP/SFTP Extractor, FTP/SFTP Loader, FileSystem Extractor, FileSystem Loader, Query Extractor, Alert Extractor, Select Transformer, Script Transformer, Binary Condition and Mail Loader).
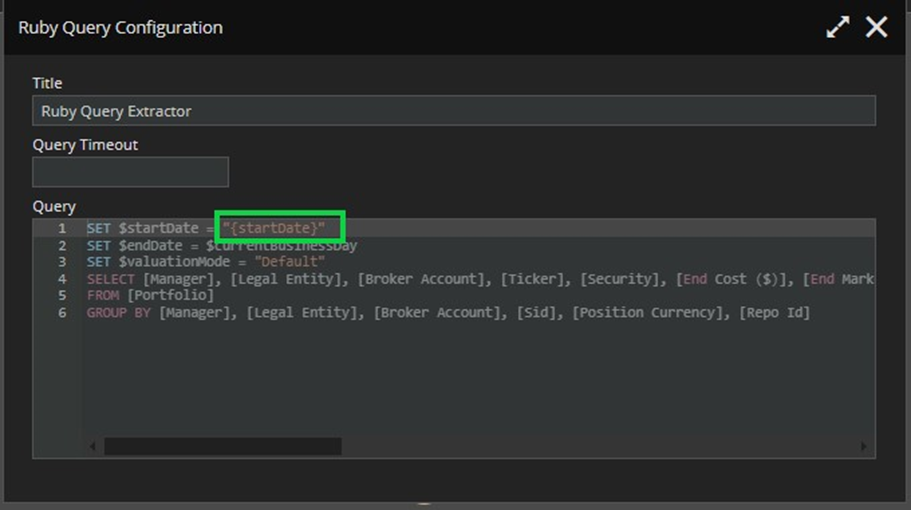
For example, you can set a date variable instead of hardcoding it in Query Extractor node (marked green in screenshot below).
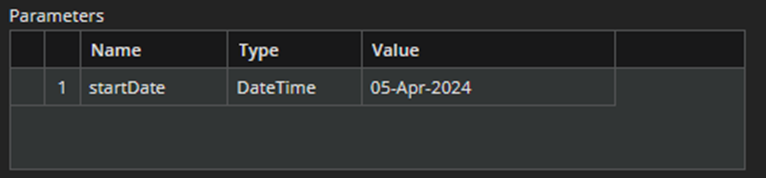
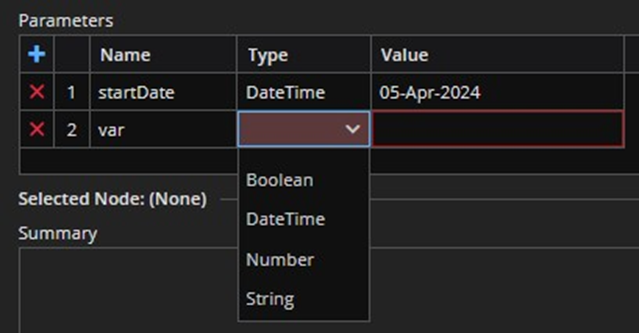
Ruby supports 4 parameter types: Boolean, DateTime, Number and String.
Of course, you can run the process manually by clicking on the RUN button in the upper right corner of the ETL process section.
After you click on the RUN button a confirmation pop-up will appear asking ‘Are you sure you want to run ETL Process “123”?’ like in the screenshot below.
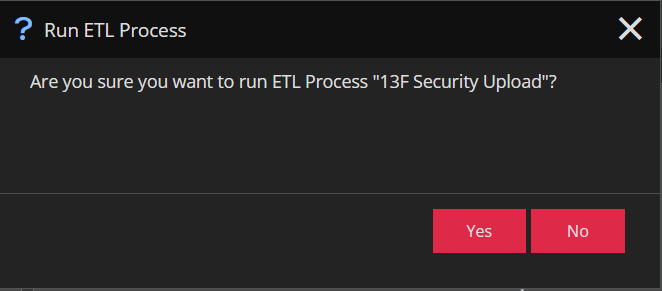
So, you will have to confirm that you want to run the process.
There are exceptions when the RUN button is disabled and you won’t be able to run the process from the ETL module (for example 13F Report process).
Also by clicking on EDIT button in the upper right corner you can edit selected ETL process.
By clicking on COPY button, Ruby will offer you two options, Copy Process and Copy Process Configuration.
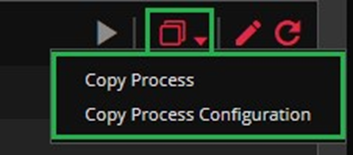
When you click on Copy Process Configuration, the selected process configuration JSON string will be copied to the clipboard. You can use this action to copy process from one environment to another.
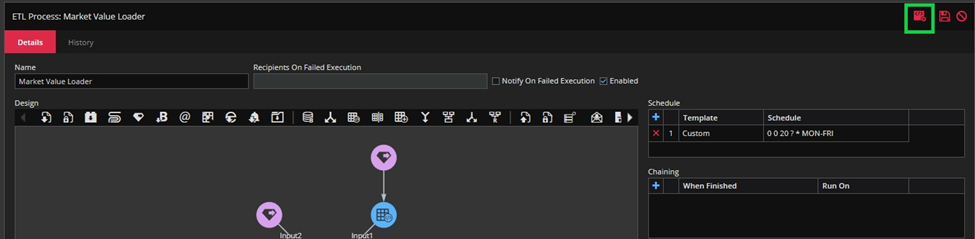
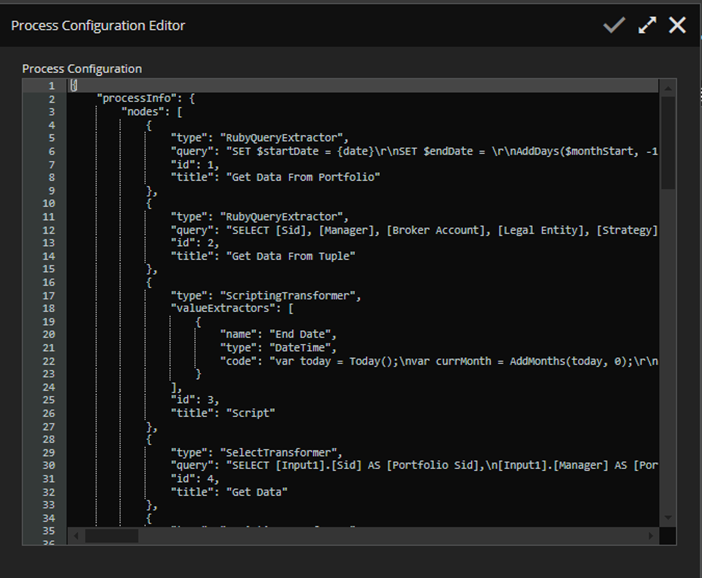
After that, Process Configuration Editor will be open, and you can change the configuration.
By clicking on the History, you will be shown the process` execution history. This screen is divided into quarters: Executions, History Design, Execution Details and Input/Output Data.
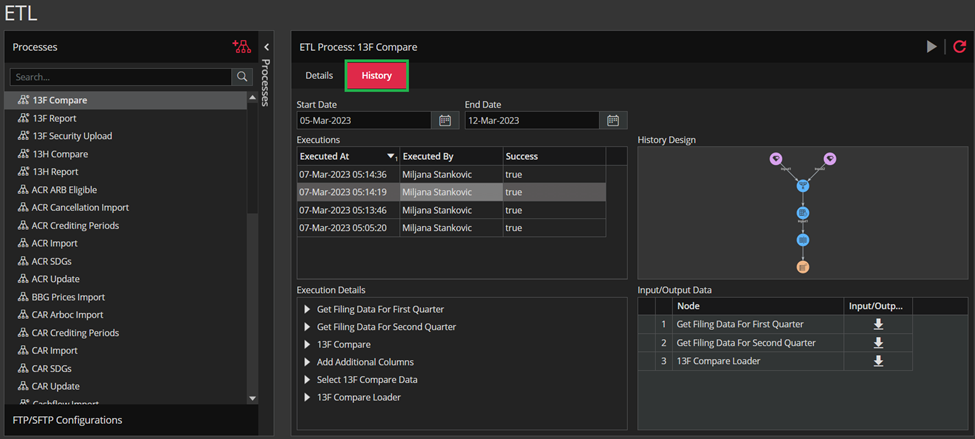
If you click at one of the available executions, you will see the complete flow of process` execution.
In the Execution Details section (the bottom left quarter), you will be provided with the information whether the node is passed successfully or not.
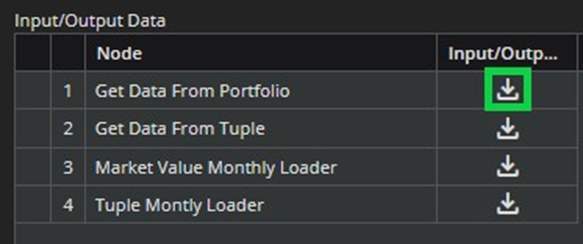
In the Input/Output Data section, you can see the files from the input/output. You can download these files by clicking the download button marked green in the screenshot below.
These were, let’s say, general ETL information. Let’s now explain how any of these nodes work.
FTP Extractor node
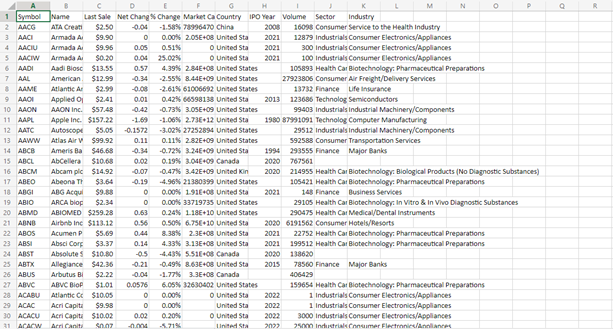
This node is used to download the data that has been located on an FTP Server. This node supports four file types: CSV, TXT, XLS and XLSX.

FTP Extractor node’s Configuration:
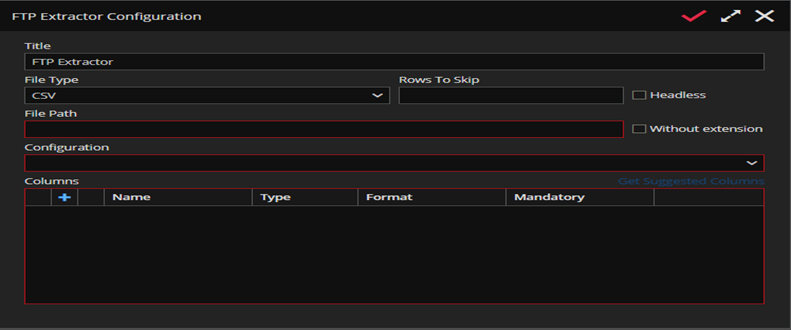
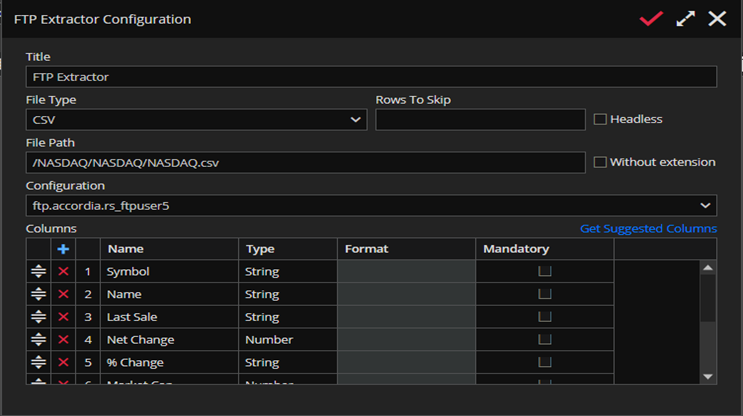
File Path: This field always starts with ‘/’ followed by the path to the selected files on FTP Server. In the end it’s necessary to add the file extension that should match the selected File Type, in case that we didn’t select option Without extension.
Configuration: You can choose one of the existing configurations for connection to FTP or we can create new configuration in this field.
Get suggested columns: It’s used to automatically add columns after we enter all necessary data. If one of the data is not entered correctly, the columns won’t be added, so basically, you can use it as a check of the entered data.
You can connect FTP extractor node with Mail Loader node to check the results.
SFTP Extractor node
Basically, this node have the same configuration as FTP Extractor node, the only difference is that SFTP Extractor is used to download the data that has been located on SFTP Server.

Input Extractor node
You can use this node to download the file that we choose when ETL process is run.

Input Extractore Node’s Configuration:
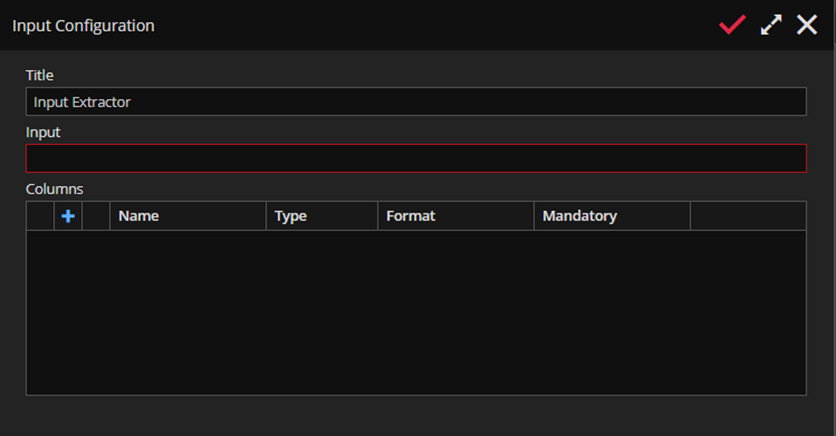
Input: The default name is ‘Name’ but you can change it.
Columns: You need to add desired columns in this field. Also, you can choose that some of the added columns be Mandatory.
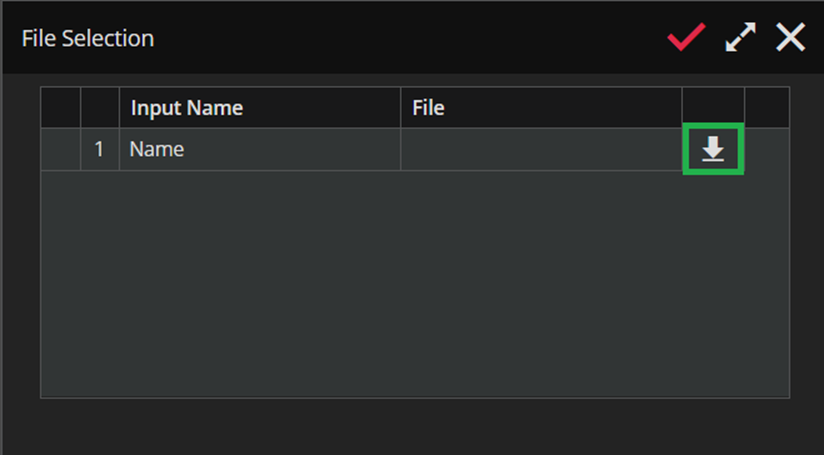
After the process is run, you need to upload the file in the File Selection window.
Also, you can connect this node with Loaders in order to load data in the application.
Statement Extractor node
This node parses certain data from financial reports.

Statement Extractor node’s configuration:
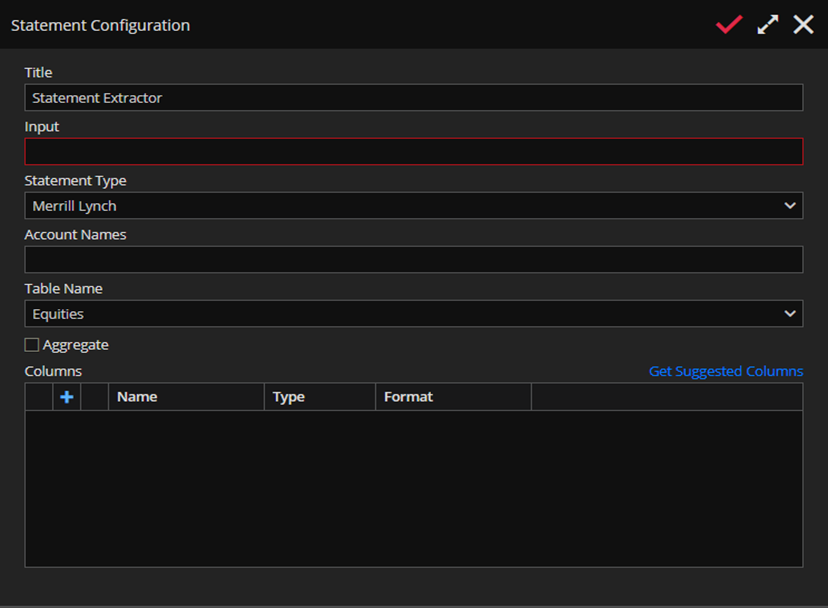
Statement Type: You can choose between 5 types of financial reports as Alex Brown, Merrill Lynch, RBC, US Securities and Wells Fargo.
Account Names: This is an optional field, and you can use it when you need data for a certain account. In case you left this field empty, the node will provide you the data for all accounts.
Table Name: This is the field where you can choose what kind of data you need (Equities, Mutual Funds, Long Portfolio, Long Term…).
This node is often connected with Tuple Loader node in order to load parsed data from the statement.
Ruby Query Extractor node
This node will provide you the data from a certain query. You can copy queries from Products or some other module or you can write them by yourself.

Ruby Query Extractor Node’s Configuration:
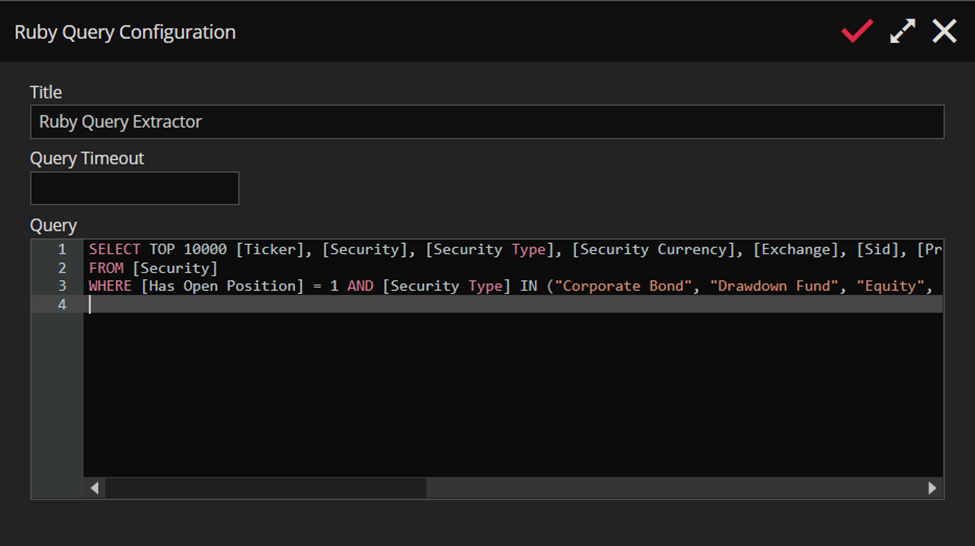
Query Timeout: This field will allow setting the desired amount of time that the user wants to let the operation to last before the timeout happens, in seconds. If the field is empty, we are keeping the default value: 30seconds.
Query: The box where you can write your query.
Connecting this node to a mail loader is necessary if you simply want the query’s results sent to you via email. You will need to use the Select and Scripting nodes as well if you have a lot of data from the query and want to upload files to a loader of some kind(Tuple Space Loader, Price Loader…).
Bloomberg File Extractor node
This node works with BBG files.

Bloomberg File Extractor’s node configuration:
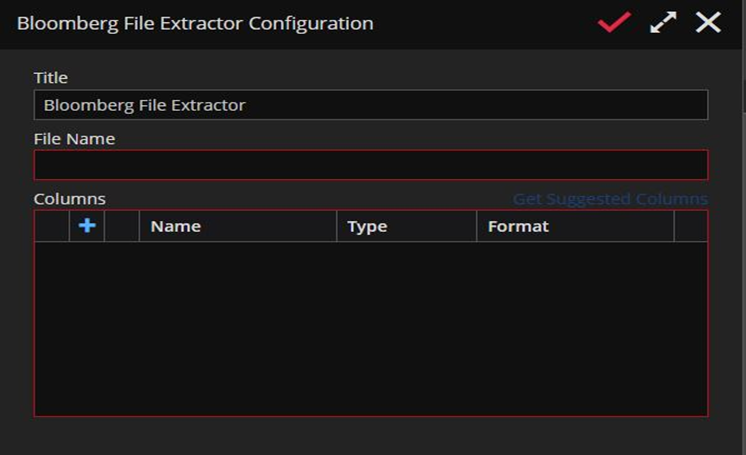
In order to work properly, BBG files need to be in a folder on a specific location in the server machine.
File name: You will need to enter the location of the file from the previously mentioned folder.
Columns: If the file exists on that location, you can use ‘Get Suggested Columns’ to get desired columns.
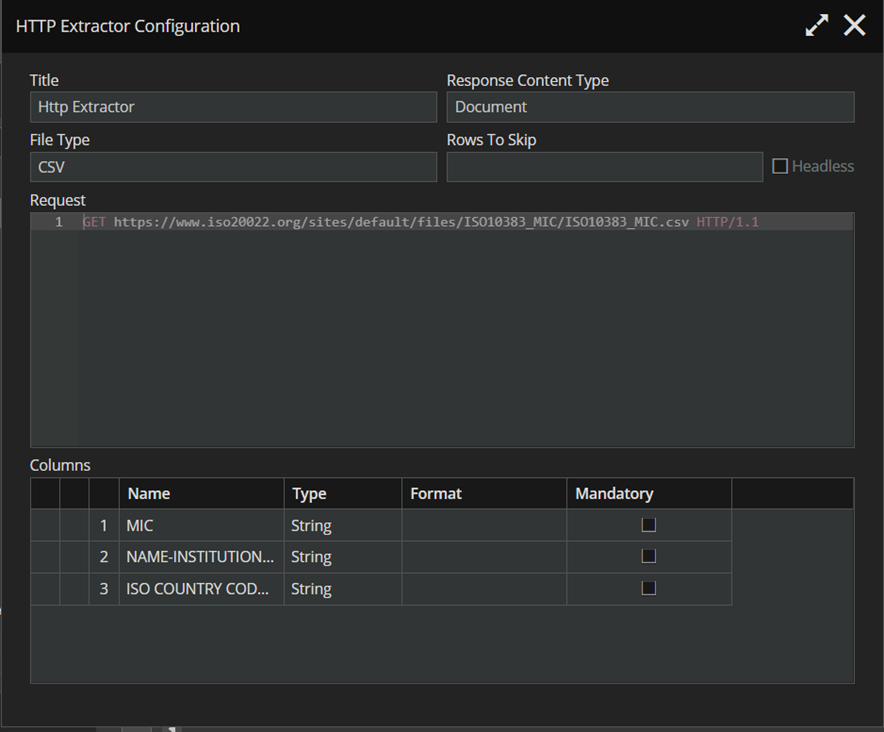
HTTP Extractor node
This node allows you to download JSON files or other files from APIs.

HTTP Extractor’s Node Configuration:
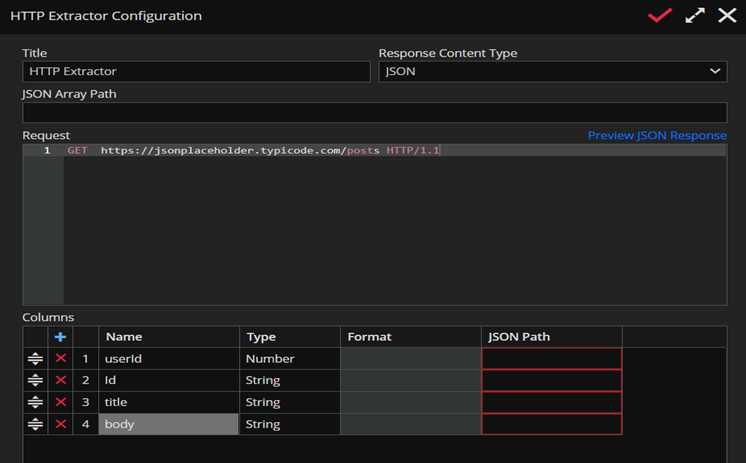
When you write a request, the Preview JSON Response will appear, through which you can see the given json file and fill in the columns according to it.
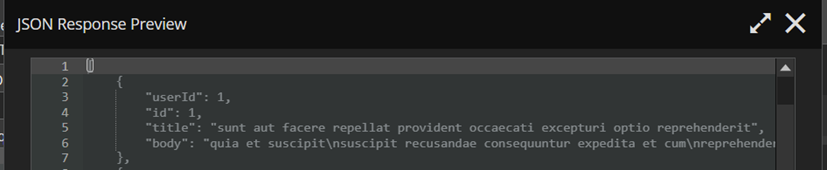
If you choose Document as the Response Content Type, the File Type must match the type of data you are downloading.
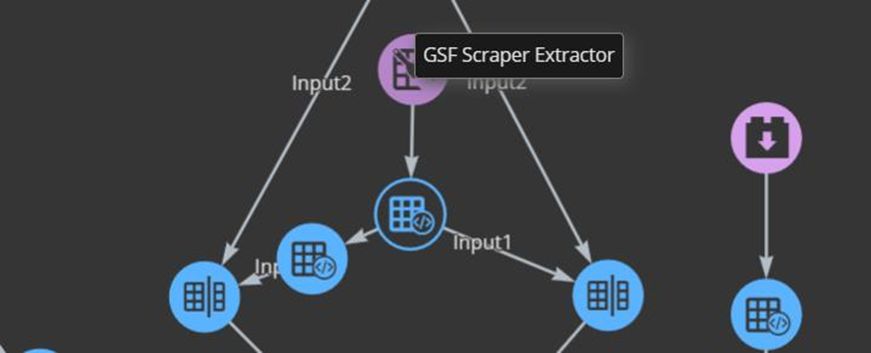
GSF Scraper Extractor node
This node holds it’s setup in the implementation already, all you need to do is to add the next node to connect it with.

Enfusion Extractor Node
This node provides you information from the reports on Enfusion system.

Enfusion Extractor Node’s configuration:
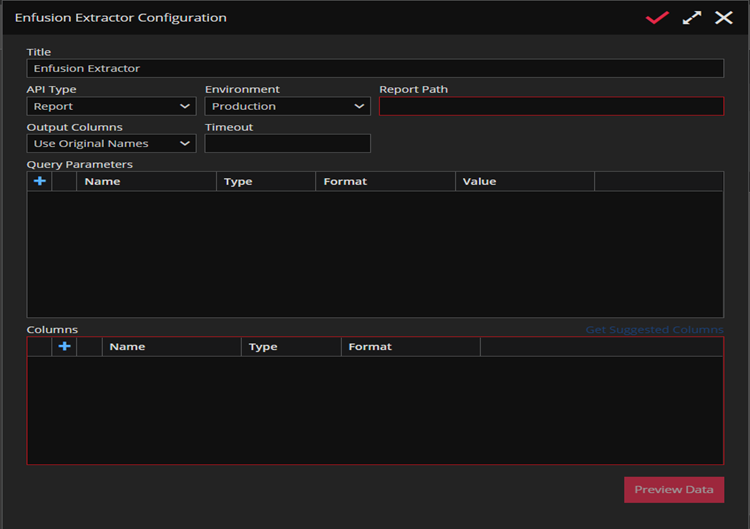
API Type: You can choose between Report and Legal Entity type. In case of API Type- Report, you should have “Report Path” input, and in case of Legal Entity, you should have “Legal Entity” input.
Environment: You can choose between Production and Test in environment dropdown. These two options are set according to the links provided by Nantahala.
Report Path: This field is mandatory. It represents the path to the report on Enfusion system.
Environment and Report Path/Legal Entity together creates an URL path to the reports.
Output columns: Enfusion gives you two possibilities for column names. The first one “Use Original Names” represents names original names from software, and the second one “Use Display Names” represents names given by users.
Timeout: This field will allow setting the desired amount of time that the user wants to let the operation to last before the timeout happens, in seconds. If the field is empty, we are keeping the default value – 5 minutes.
Query Parameters: These parameters are defined in Enfusion system.
Columns: You need to enter the required columns. Get suggested columns will return columns if the path is set correctly.
Alert Extractor node
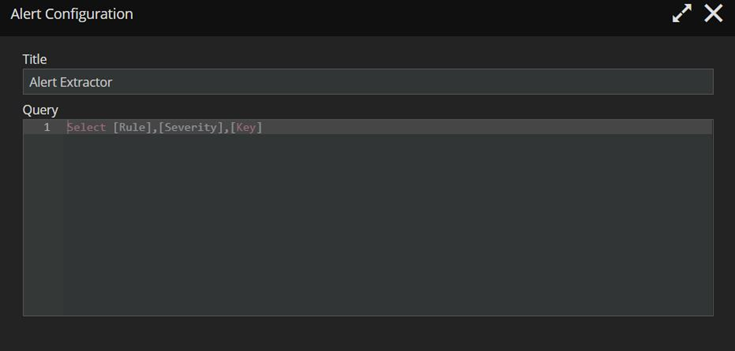
This node is used in order to receive notifications from the Alert module. To get desired information, you need to enter some query without FROM command.

Alert Extractor Node’s Configuration:
File System Extractor node
This node allows you to download the data from files located in Checklist module.

File System Extractor Node’s Configuration:
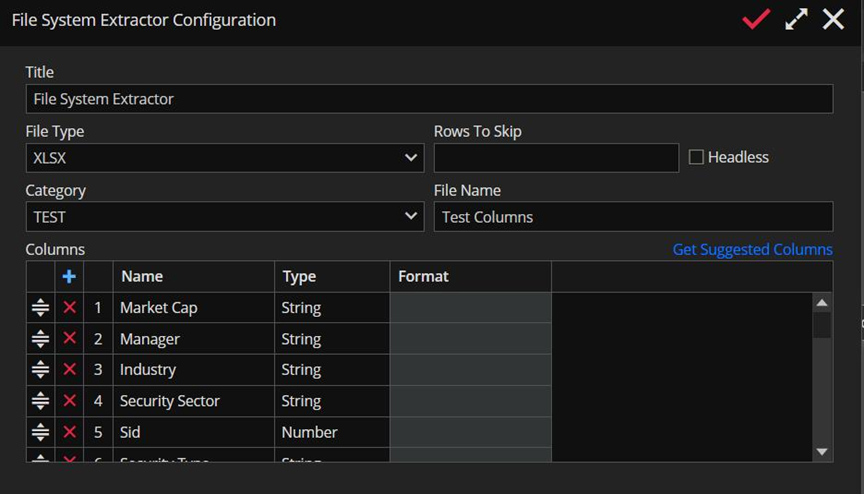
Category, File Name and Columns are required fields.
Rows To Skip can be used to skip some data in our file and all we need to do is to write a number.
The category field we populate based on file’s location.
You can add columns manually or use Get Suggest Columns.
Bloomberg Data Set Transformer node
You can use this node to fetch the data from Bloomberg.
Bloomberg Data Set Transformer Node’s Configuration:
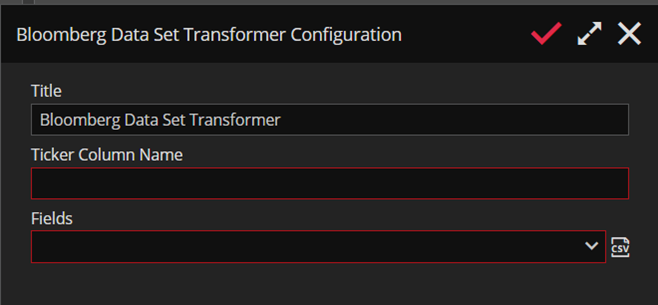
Ticker Column Name: In this field you need to enter desired name. Also, this field is required so you can’t leave it empty.
Fields: In this field you can choose for which fields you want to fetch the data from Bloomberg. You can choose from dropdown menu, or you can add required fields from csv file, by clicking on CSV button.
Here is an example:
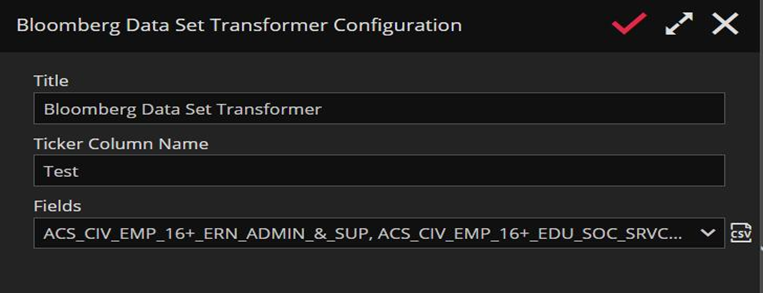
In order to get files from Bloomberg, you will need to connect this node to a Mail Loader.
Binary Condition node
This node allows us to set a binary condition.

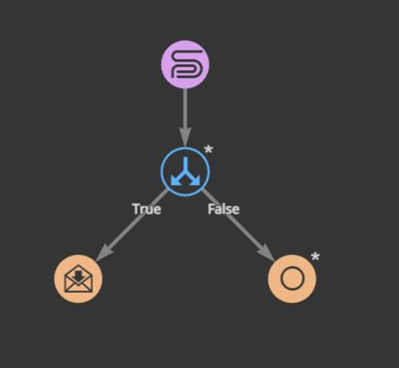
If condition is true, Binary condition node will go to node marked as True, and if is not, Binary condition node will go to False node.
Binary Condition Node’s Configuration:
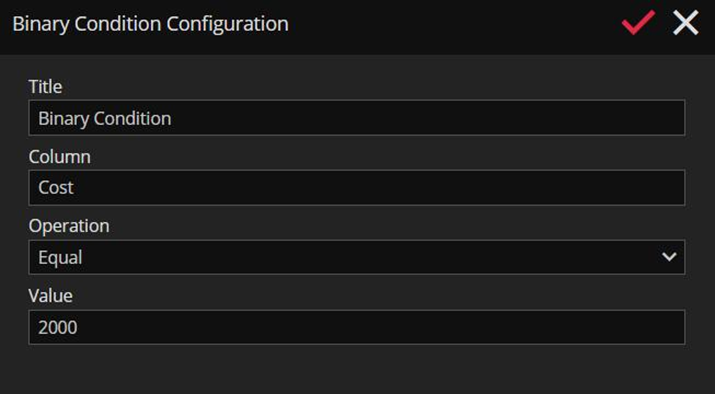
Column field: You are choosing for which column you want to set conditions In this field.
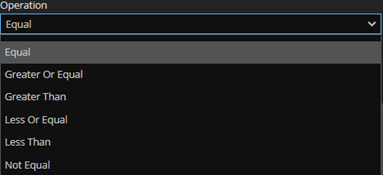
Operation field: Default value is Equal, but you can choose the desired operation from Operation’s dropdown menu. Of course, you cannot add more operations than one.
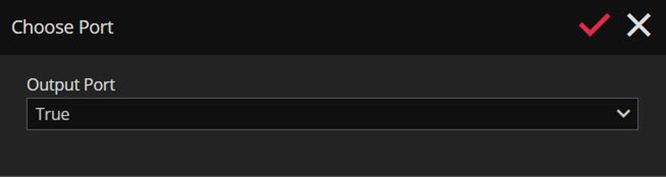
When condition is all set, you need to connect to another node. After connecting, youcan see following pop up and to choose desired port.
Script node
This node allows you to enter a code in ETL process.
Script Node’s Configuration:
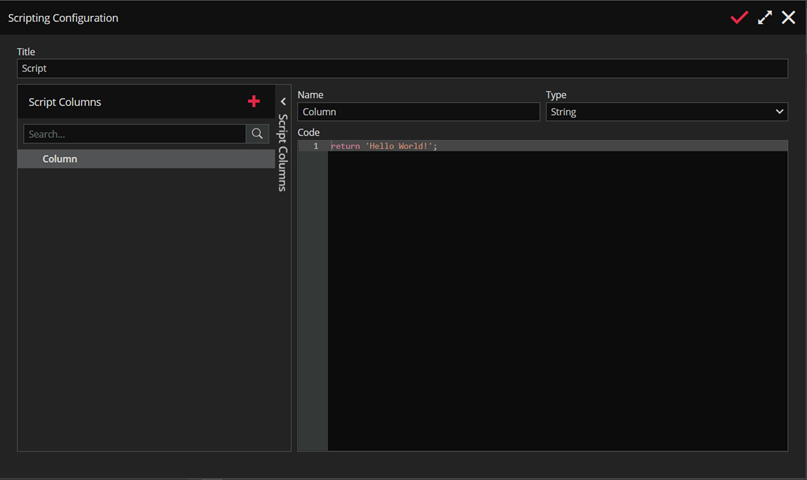
Name field: The default name is Column, but you can change it as you want. The name of the column must be unique, which means that two columns can’t have the same name. Also, the Name can’t be empty.
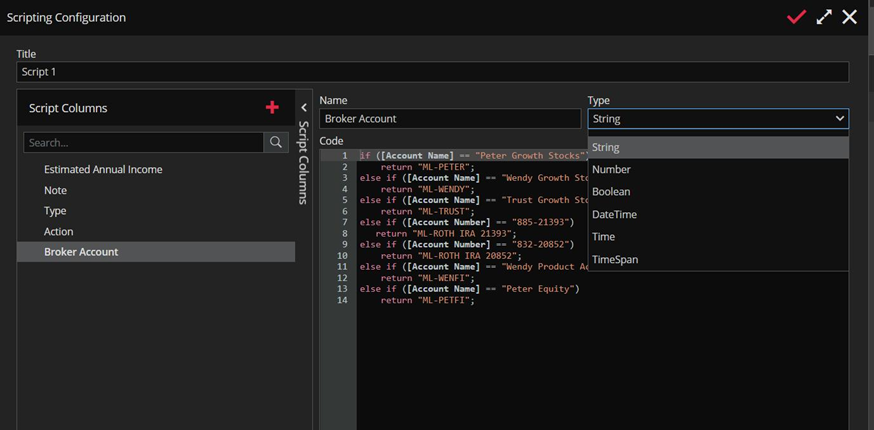
Type field: You can choose the type of column in Type’s dropdown menu. Offered types of columns are: String, Number, Boolean, DateTime, Time and Time Span.
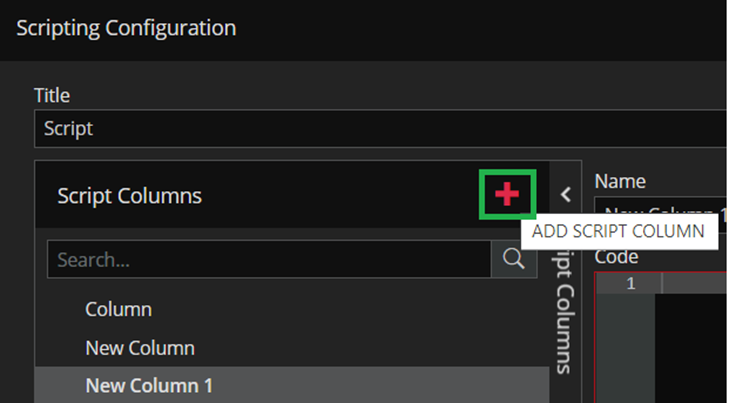
You can add as many columns as you want by clicking on ADD SCRIPT COLUMN button marker green in the screenshot below.
Here is an example:
Select node
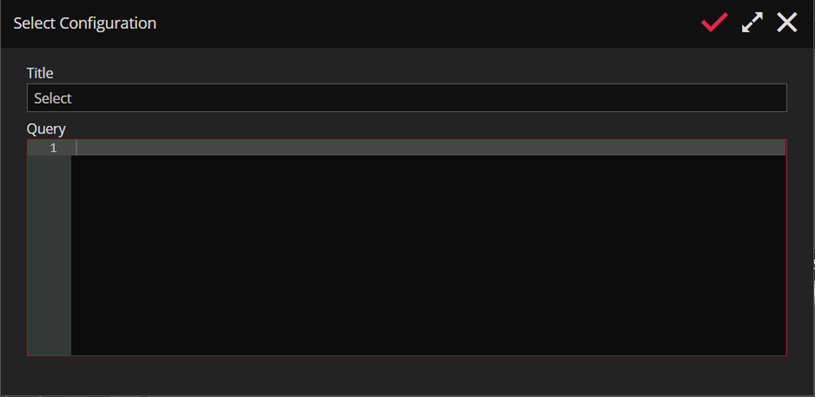
This node is used to select information from desired query.

Select Node’s Configuration:
Query Expander node:
This node allows you to use SELECT command on tuple even though is not added to the process.

Query Expander Node’s configuration:
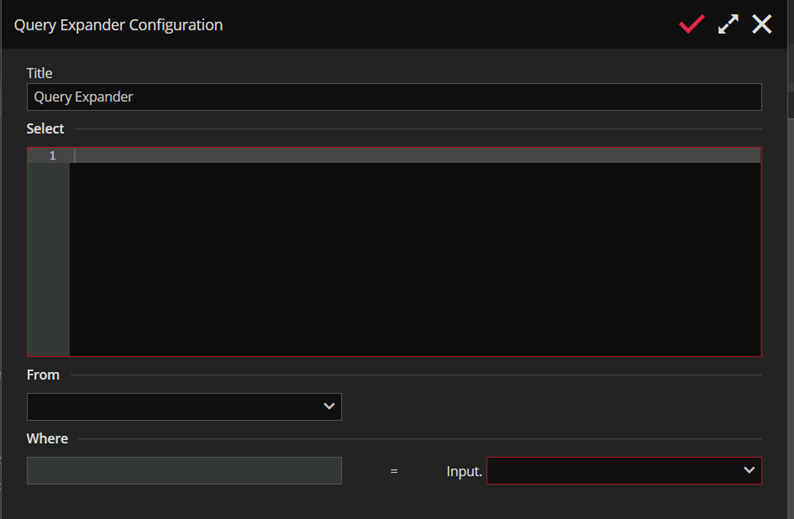
From field: In dropdown menu of From field you have a list of all created tuples. You can only choose one Tuple in the time.
Where field: This field is populated automatically based on the selected tuple in From field.
Input field: In the end, you need to choose which column needs to be equal to the selected tuple’s column.
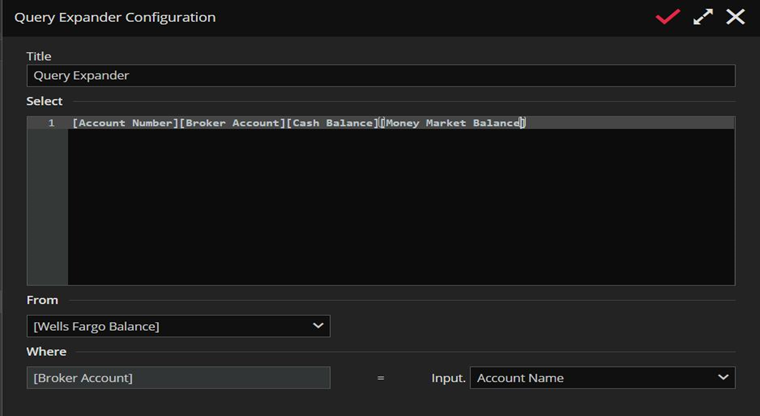
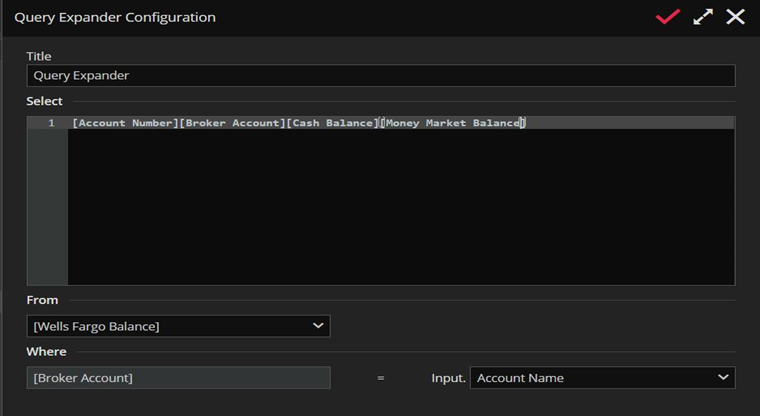
Here is an example:
Union node
This node merges two inputs into one.

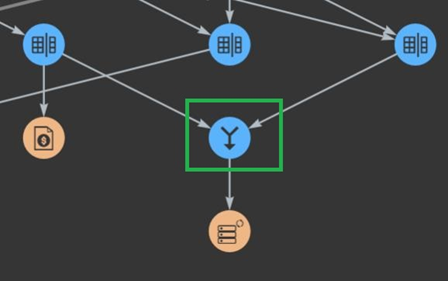
Match Until Total node
This Match Until Total transformer would have several fields in its configuration: List of columns from both inputs on which records should be joined column containing the total sum of the batch on the one side, and a column on the other side with the values that will be summed until the value on the other side is reached.

Match Until Total Node’s configuration:
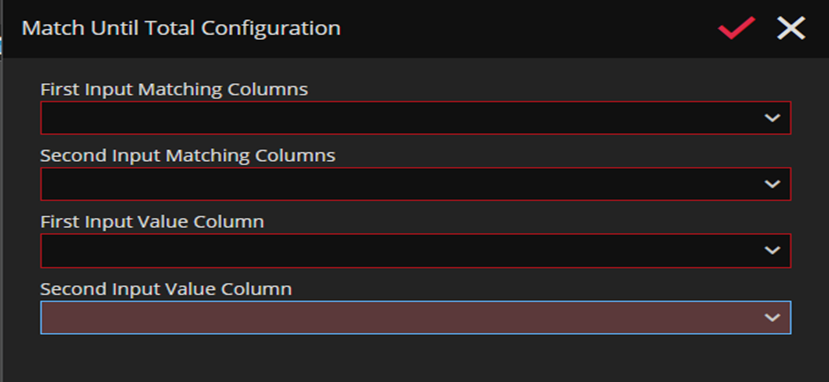
The order of the matching columns in the First Input Matching Columns and in the Second Input Matching Columns fields has to be the same.
There cannot be the same column offered in the corresponding Input Matching Columns and in the Input Value Column.
Path Decision node
This node is similar to a Binary Condition node, but in this node you are setting a condition for Row Count Operation.

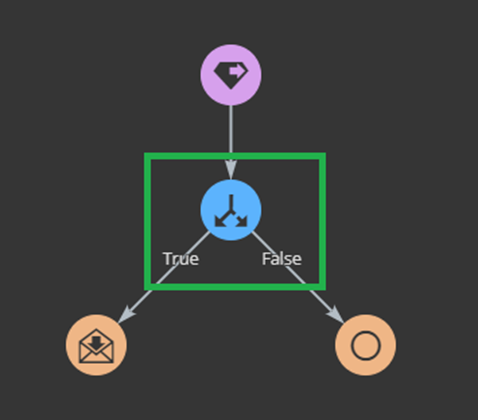
Path Decision Node’s Configuration:
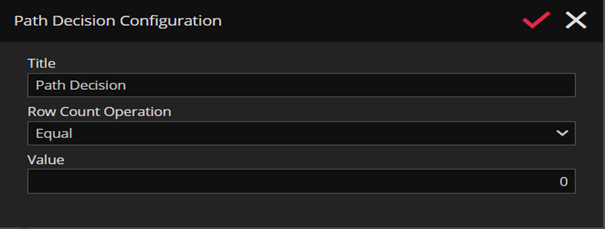
Row Count Operation: This field allows you to choose an operation from the dropdown menu. The default operation is Equal, but you can choose between Equal, Greater or Equal, Greater Than, Less or Equal, and Less Than or Not Equal.
Value: In this field, you need to enter the desired value. The default value is set to zero.
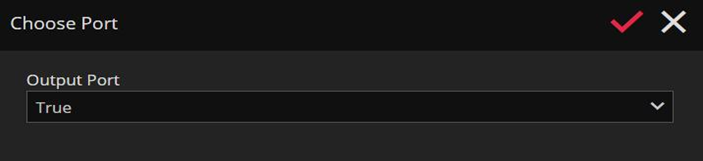
When all fields are filled, you need to connect with another node. After connecting, you can see the following pop-up and choose the desired port.
Reconciliation node
This node should reconcile the data from the two inputs.

Reconciliation node’s configuration:
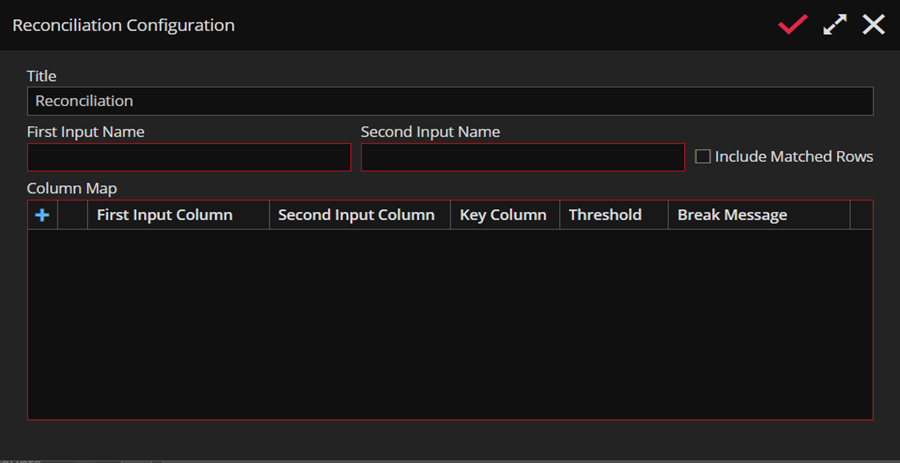
Columns of the two inputs should be used as sources for the First Input Column and Second Input Column combos.
Column map configurations grid should have at least one row and the First Input Column and Second Input Column pairs should be unique.
If you check Key Columns, Threshold and Break Message should be disabled. Also, if First Input Column or Second Input Column doesn’t have a type number, Threshold should be disabled.
FTP/SFTP Loader node
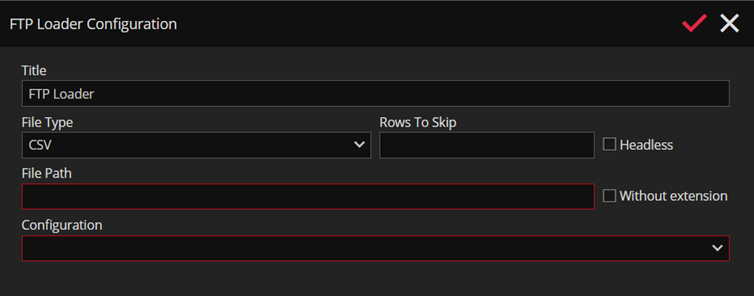
This node creates a new file with given data on FTP/SFTP servers.

FTP Loader Node’s Configuration:
SFTP Loader Node’s Configuration:
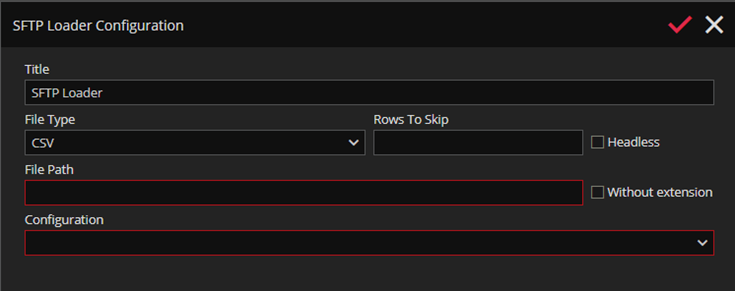
Basically, you populate File Path and Configuration in the same way that we explained for FTP/SFTP Extractor nodes above.
Tuple Space Loader node
This node allows you to populate desired tuple in Tuple Space module.

Tuple Space Loader Node’s Configuration:
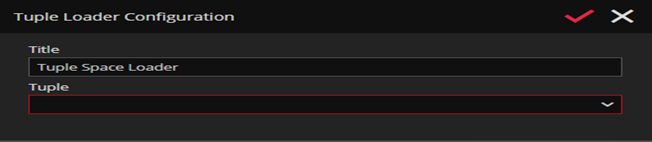
Tuple: In this field, you can choose for what tuple you want to add data. All created tuples from Tuple Space Module are listed in a dropdown menu.
Here is an example of how you can add the data in tuple. First, you need to create table, and that table should contain all required data to populate tuple. Besides the columns that you want to add, you need to add Tuple Name and Action columns.
Tuple Name contains the name of tuple, and you need to choose what action you want to perform on entered data in Action column. Allowed actions are Add, Update and Remove/Delete.

Mail Loader node
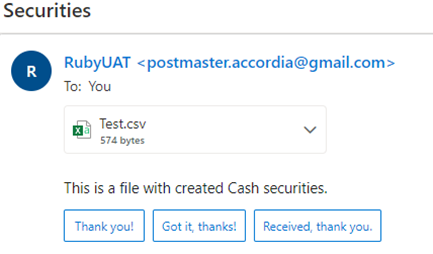
This node creates an email in the selected format and sends in to the address of the selected recipient.

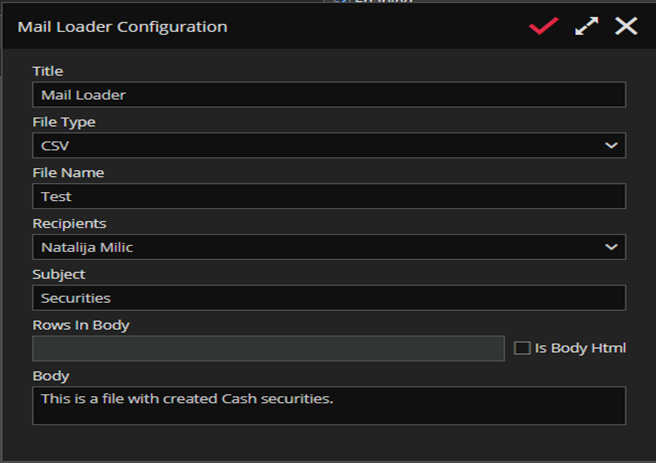
Mail Loader Node’s configuration:
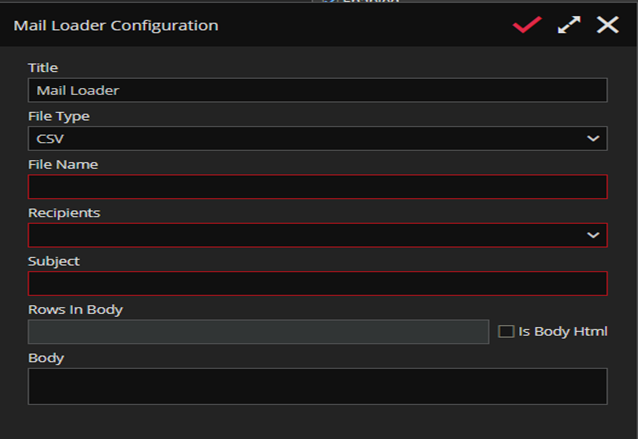
File Type: You are choosing between CSV, TXT and XSLX file types.
File Name: In this field, you are choosing the name of the file that will be sent by mail loader.
Recipients: In this field, you are choosing a recipient from the dropdown menu. You can choose one recipient or more.
Subject: In this field, you are choosing a subject of an email.
Rows In Body: This field will be disabled if you don’t check Is Body Html.
Body: In this field, you can add text in the body of an email if you want.
Order Loader node
This node can add orders in the Order module. All required columns need to be populated. You can find the required columns in Order Loader Template.

Order Loader Template:

Once you fill in with desired data, you upload the file to ETL’s Order Loader node and it automatically creates the orders based on the data you have provided.
Pricing Loader Node
This node allows you to Add, Update and Delete prices based on the data you fulfill in the template.

Pricing Loader Node’s Configuration:
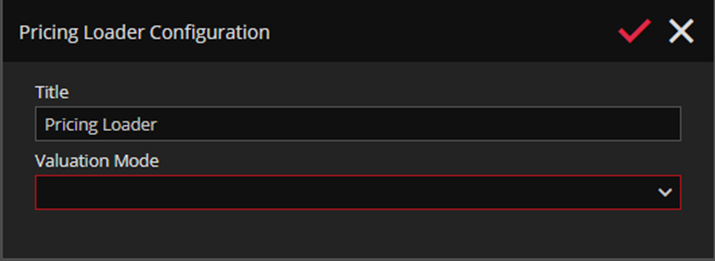
Valuation Mode: In this field, you are choosing between created valuation modes from Valuation module.
Price Loader Template:

Exchange Loader node
This node is used to enter exchange in system.

It requires three input columns. First one is, MIC, which represents the code of the exchange. The second one, NAME-INSTITUTION DESCRIPTION, represents the name of the exchange. The last one, ISO COUNTRY CODE (ISO 3166), represents the code of the country. When you ran the process, it will be checked if there is an exchange in our system according to the ISO COUNTRY CODE field. If it exists- this node will update the exchange in our system, and if it doesn’t exist- this node will add the new one.
Security Loader node
This node can add new securities. Basically, it works in the same way as Order Loader. You download Security Loader template and populate it with appropriate data.

Security Loader template:

Fill loader node
This node is used to add fills to orders.

In order to add a fill, you will need following columns: OrderId, Fill Id, Price, Quantity and Timestamp (this field isn’t mandatory). OrderId represents id of the order, and Fill Id represents an identifier of the specified fill.
Issuance Item Loader node
This node can add Environmental Credit Issuance type of securities.

Issuance Item Type Loader Node’s Configuration:
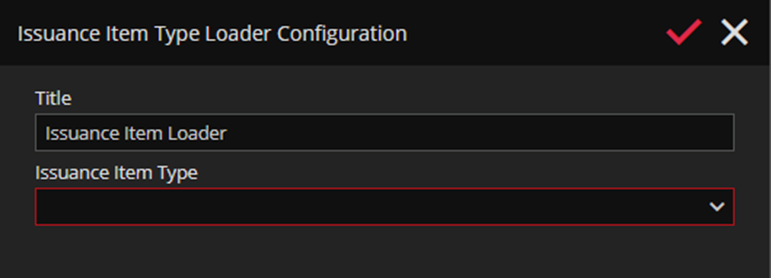
Issuance Item Type: Mandatory field where you choose what kind of issuance you want to create from the dropdown menu. Ruby offers you two types of issuances: Cancellation and Retirement.
Manual Match node

This node can add Manual Matches in the same way as we do manually in the Ruby app. But, it can only perform Add and Delete actions. In order to be able to add Manual Matches, you need to use two nodes: Input Extractor node and Manual Match node.
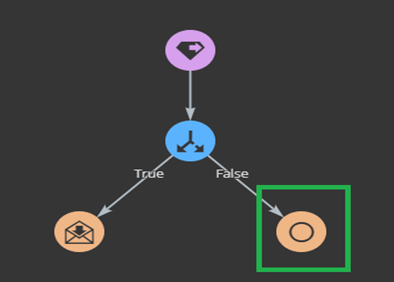
Discard Loader node
This node is used to end ETL process when the conditions set with Path Decision node are false.

File System Loader node
This node creates a report that can be reviewed in the Checklist module.

File System Loader Node’s configuration:
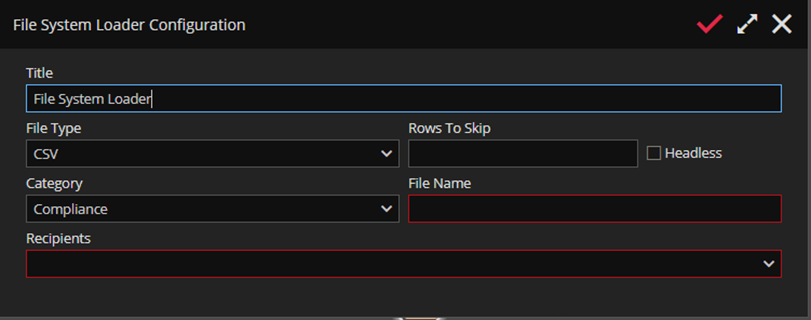
File Type: You can choose between CSV, TXT, XLSX and XLS.
File Name: You need to enter the name of the file.
Recipients: This field will be used for subscriptions in the Checklist module. Every recipient that is added will get updates from that ETL process.
Reconciliation Loader node

This node is used in REC processes to generate the data for the Reconciliation module.
Reconciliation Loader configuration:
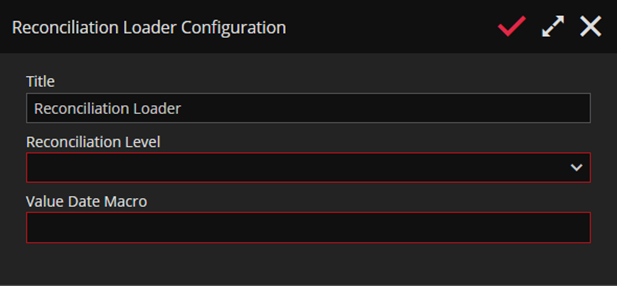
Reconciliation Level: In this field you are choosing what type of reconciliation you want. Ruby will offer you DMAXX – Positions, DMAXX – Trades, FCM – Commissions & Fees, FCM – Positions, FCM – Trades, FXPB – Commissions & Fees, FXPB – Positions, FXPB – Trades and Undefined type.
Value Date Macro: In this field you are specifying for which date you are doing the reconciliation.
Fix Request Loader node
This node is used for sending FIX messages to selected FIX session.

Fix Request Loader configuration:
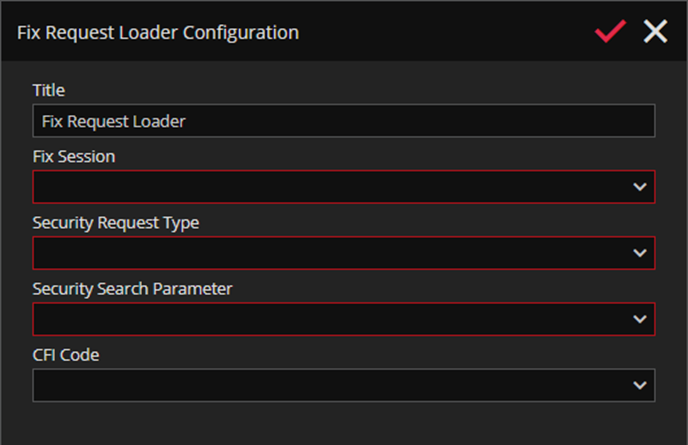
Fix Session: In this field you are selecting the desired Fix Session.
Security Request Type: In this field you are selecting the desired request type. Ruby will offer you List of Defined Strategies and List of Securities.
Security Search Parameter: In this field you are selecting whether you want to use Security Id or Symbol as search parameter.
CFI Code: In this field you are selecting CFI code pattern.
That was about nodes, let’s move to the next tab.
The second tab, as we mentioned earlier, is for supporting global FTP/SFTP configurations. This is how it looks when you navigate to this accordion.
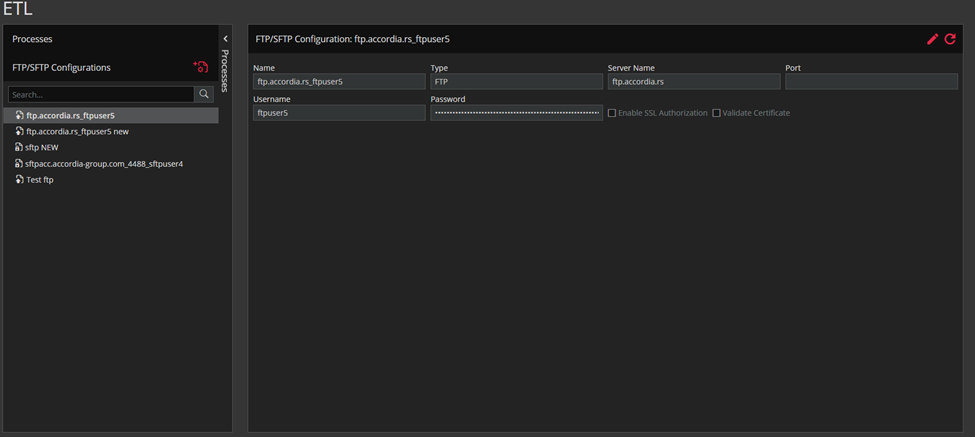
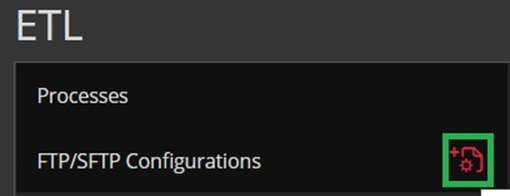
You can add a new FTP/SFTP configuration by clicking on ADD FTP/SFTP CONFIGURATION button (marked green in the screenshot below).
After clicking on button, you should select the Login type.
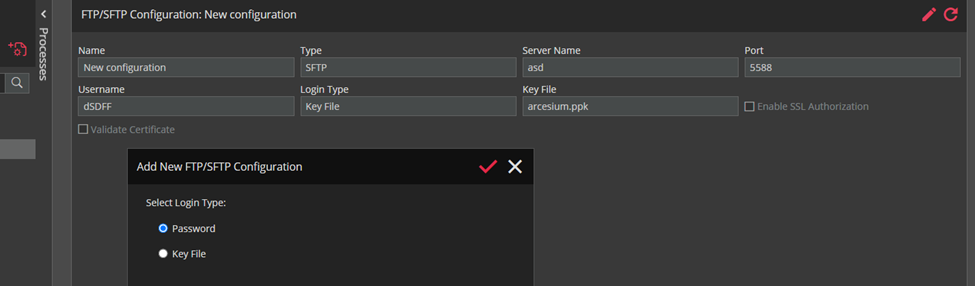
You can choose whether you want to create a new FTP or SFTP configuration when you select Password as the login type, and after that you need to populate the required fields.

In case when you want to create SFTP configuration, these two checkboxes (Enable SSL Authorization and Validate Certificate) will be disabled.
When Key field is selected as login type, SFTP is defaulted type of a new configuration.

In both cases, when you’re creating new users, the password will be encrypted.
You can edit saved configurations only if you have Edit ETL Configuration permission, but Ruby will not allow you to edit the type of saved configuration regardless your permissions. Also, Ruby won’t allow you to delete a configuration that’s already used in a process.
The third tab, PGP Keys, is for encrypting and decrypting files. This is how it looks when you navigate to this accordion.
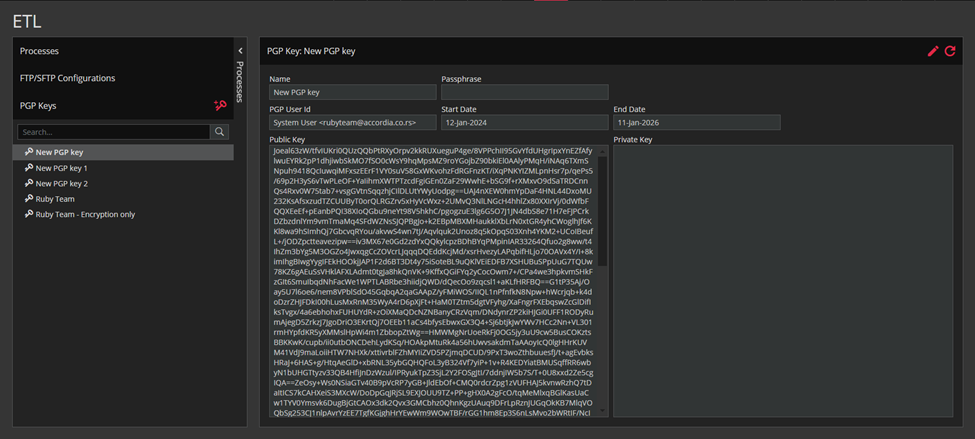
You can add the new PGP Key by clicking on ADD PGP KEY button (marked green in the screenshot below).

After you click on the button, this is how it looks.
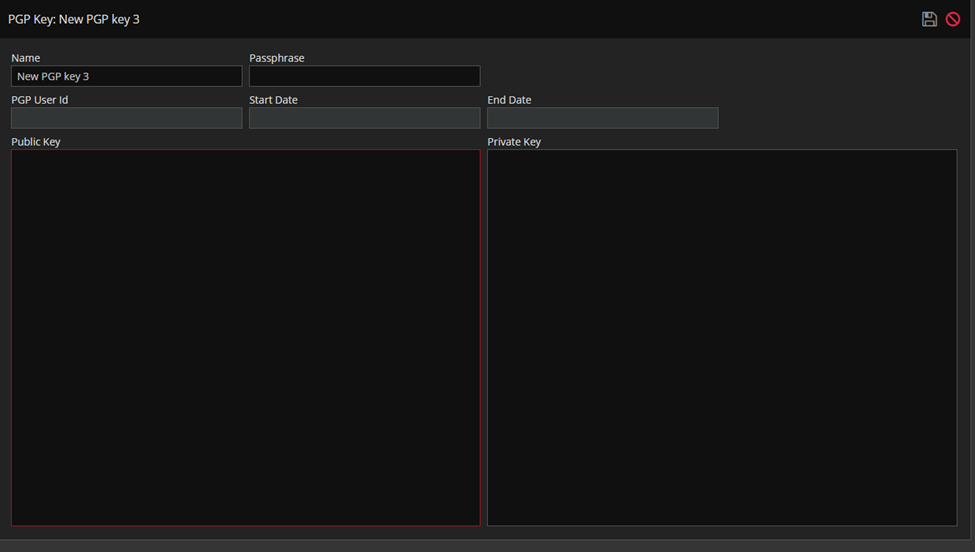
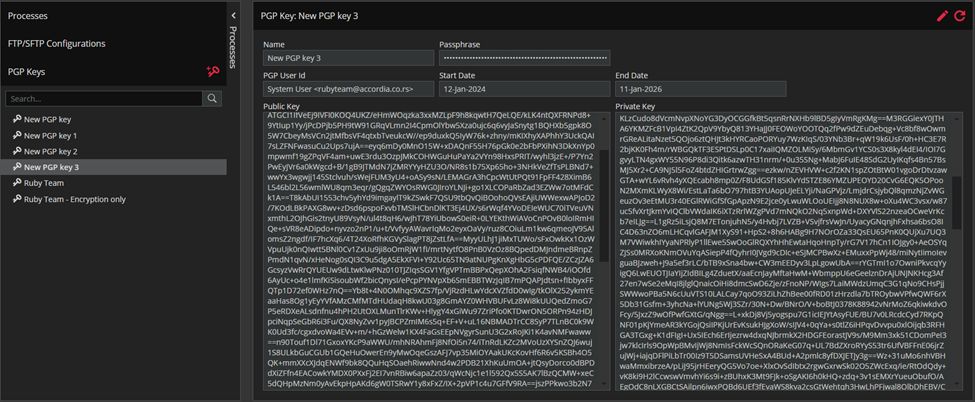
First, you add the Public Key, and after that you add Private Key. In order to save the key, you have to add the Passphrase. Here is the created key.
At the end of this section, we are introducing the list of macros that can be used in calculated columns definition, in alert rules, rules etc. The first column is the name or signature of the macro. The next five columns are descriptions of the parameters received by that macro. Then we have Returns column which describes what that macro returns when is executed and finally an example of how the use of that macro would look like.
